In July 2024 I was exhibiting at Liverpool Makefest again. This is a fantastic family friendly makers event that is open to the public for free. It has always been a great place to show off the various RC2014 kits as well as have something interactive that can keep people entertained.
Normally I have a machine set up running Snake, but this year I was about to launch the Dual Paddle Analogue Module, so I wondered about making something with that. The idea of an Etch-a-sketch came up, and coupled with a NeoPixel Matrix Module I figured this would be a nice self contained demo unit.
I could handle the electronics and the physical build, but I reached out to Shiela at Peacock Media to see if she could help on the software side. As both the Dual Paddle Analogue Module and the NeoPixel Matrix Module were Shielas design she jumped at the idea. it was only 5 days before the event though, so we needed to move quick.
There were some important design considerations. Firstly, it had to be robust. One thing about the audience at Liverpool Makefest is there are quite a few kids and they are not always gentle with the exhibits. It also needs to be intuitive. If people need to read instructions, or things don’t give a satisfying output in the first few seconds they you have lost them. On top of that, it should really be self contained to the point where there is no need for a monitor or keyboard, and it just runs as soon as power is applied.
The first thing I needed to work out was the control mechanism. Two potentiometers, obviously, for X and Y, but how are they going to me mounted. I ran through some gamepad type prototypes but things weren’t quite feeling right. Then I noticed a couple of Pot Noodle pots sitting on my desk. These tapered plastic pots are great for pencil pots or other storage, and they stack really nicely. Two stacked together actually turn really nicely and feel good. But could a Pot Noodle pot house a pot? The Pot Noodle was launched at the same time as the Z80, so it seems like destiny, right?
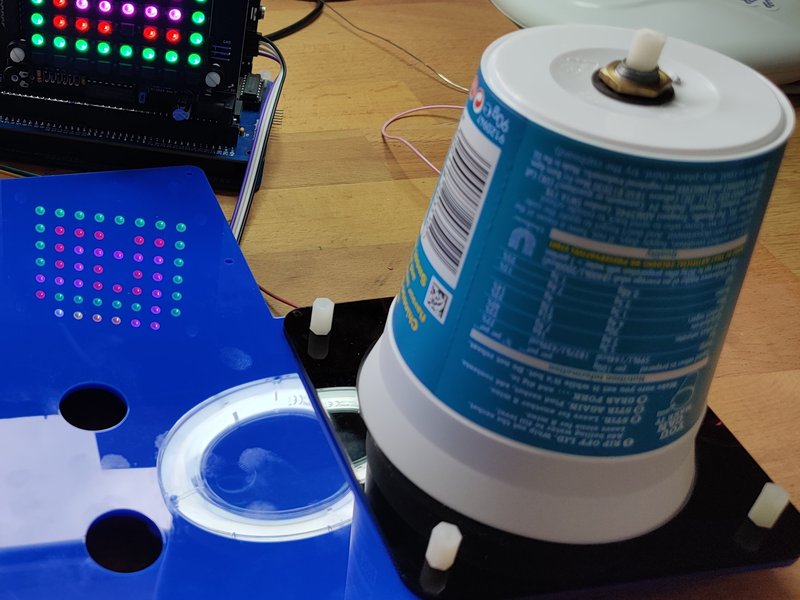
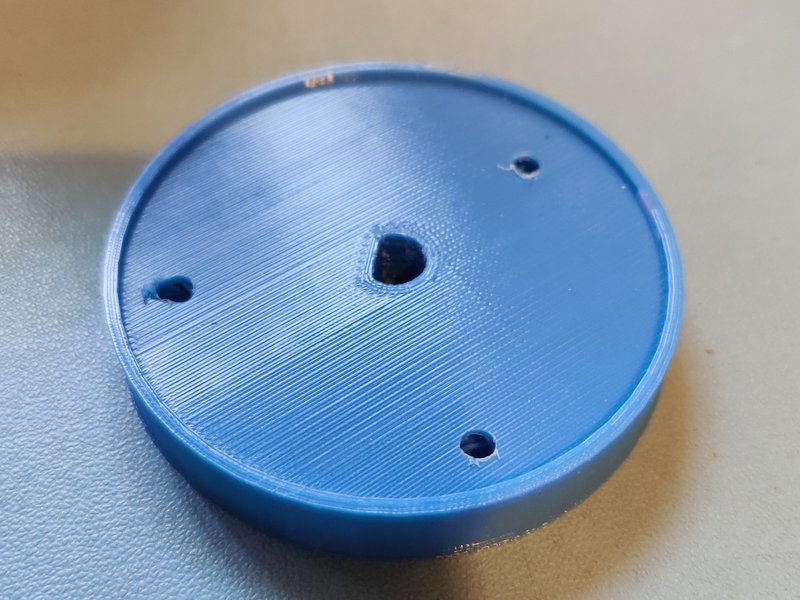
Off to the laser cutter to knock up a prototype. This consisted of a flat square plate with 3.5mm holes in the corners, and another matching plate that had a 100mm hole. This hole was slightly smaller than the brim of the pot, so when screwed down it holds the pot really really tightly to the base. With another pot on top it rotates really well. Putting 10mm standoffs and another pate with 100mm hole in it still allows it to rotate and it prevents the top pot from coming off.
fixing a 10k linear pot to the lower pot was easy enough. I used these lovely vintage RS pots that have a D-shaft


However, fixing the top pot to the shaft was a challenge. Making a D-hole in the top didn’t sound robust, so I decided to 3D print a couple of parameterised knobs in OpenSCAD. I could then glue these inside the top of top pot.
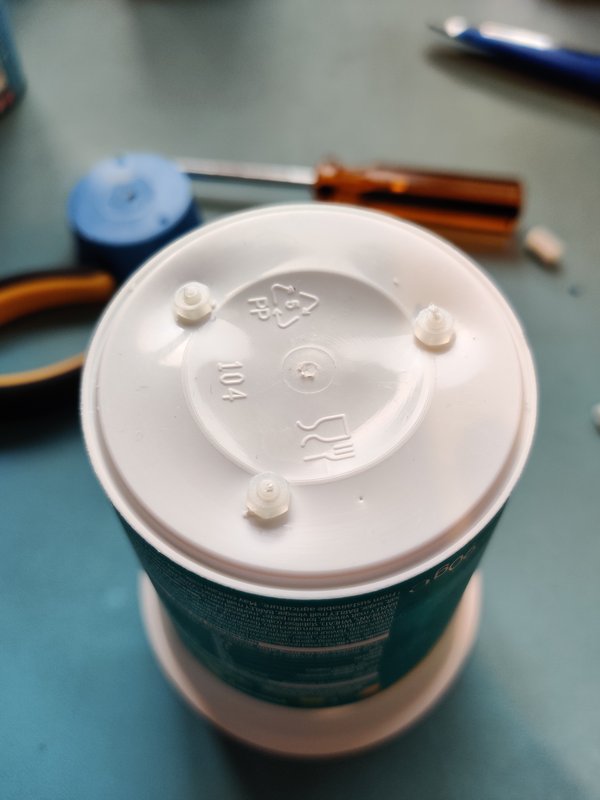
Dear reader, let me share one thing I now know about gluing PP (Polypropylene) plastic that the pots are made of PLA (polylactide) the 3D print it made of – you cannot! There isn’t a glue or solvent that will work. Trust me, I tried many many things.
However, mechanical fasteners (M3 nuts and bolts) do work! The image above shows some holes drilled in the 3D part. Similar holes were drilled in the pots and they were bolted together. Rugged, child-proof and even repairable if needed!

This could now sit on the D-shaft of the pot, and kept from being removed by the top plate.
Next the question about additional controls. Whilst the original Etch-a-sketch was monochrome, the NeoPixel display didn’t have this limitation. There are a few ways to add a digital button to an RC2014, but when there is already an analogue module plugged in, it would be nice to use that.
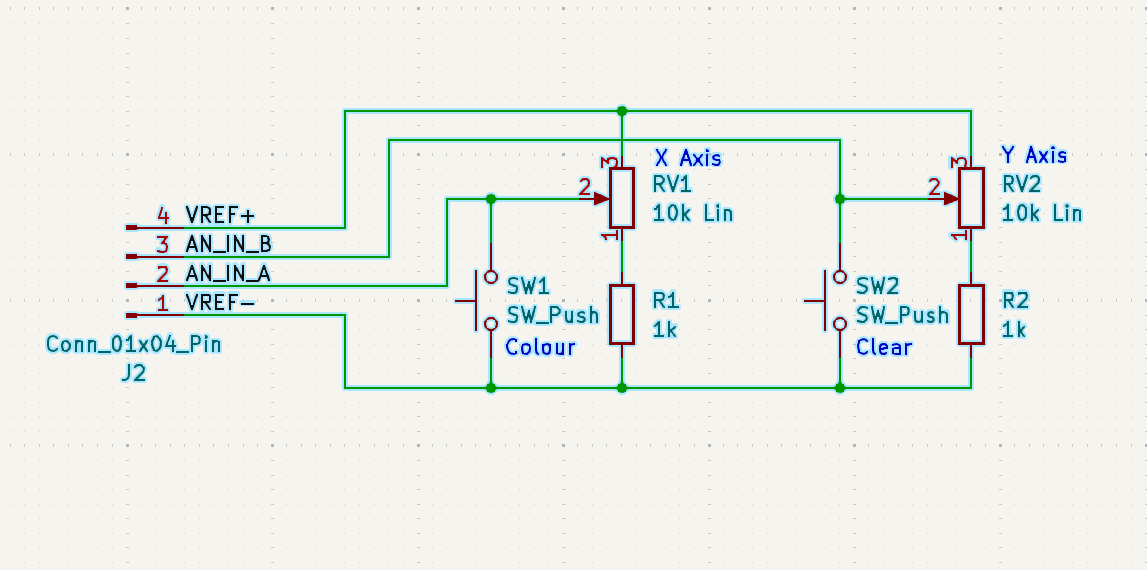
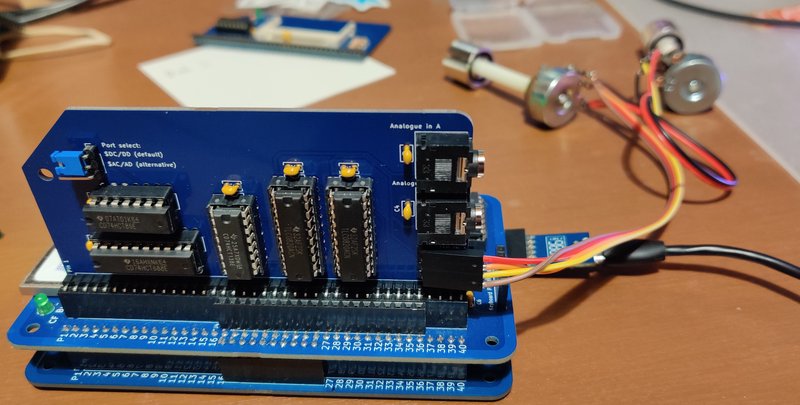
To achieve two buttons of input, a 1k resistor was added to the negative side of the pot and a switch on the wiper going to ground. In normal use the 8 bit value from the variable resistor will only go down as low as 23, and as high as 255. When the switch is pushed the value is 0. So the software only needs to map approximately 25-255 to the 8×8 display, and anything less than 10 can be treated as a button press. With two pots, this allows 2 buttons, one for to cycle the colour, the other to clear the screen.
Note that it is tempting to put a 1k resistor and another switch going to the 5v line. This will give an extra two buttons, which would be great. However, if both buttons are pushed at the same time it will be shorting 5v and ground. This is a Bad Thing™ and certainly not something you want on a public facing exhibit. Even with a “do not push both buttons at the same time” sign!

A couple of arcade buttons worked great for this, although a label was put on as an afterthought as they weren’t quite as intuitive as hoped.

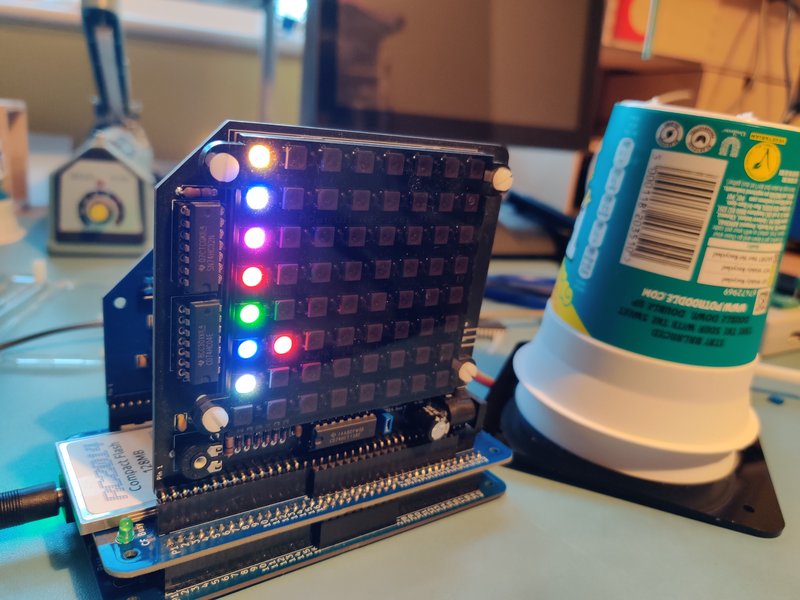
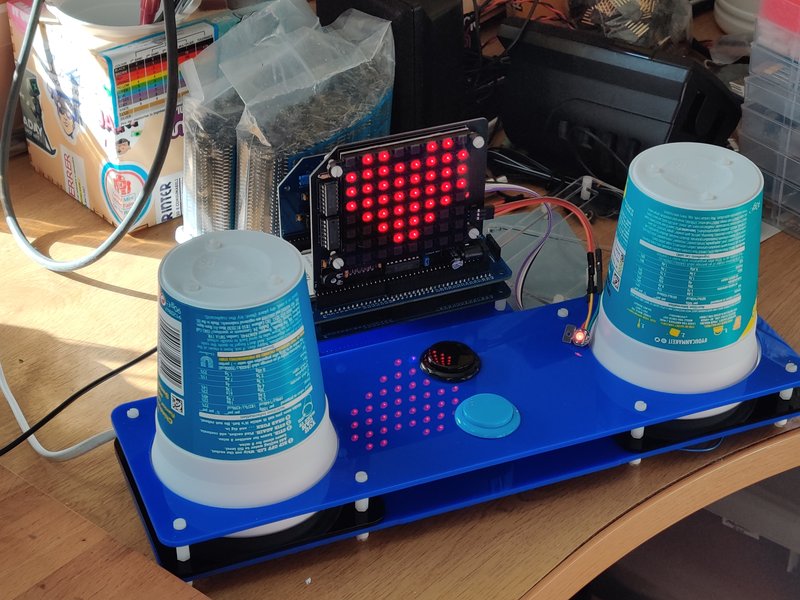

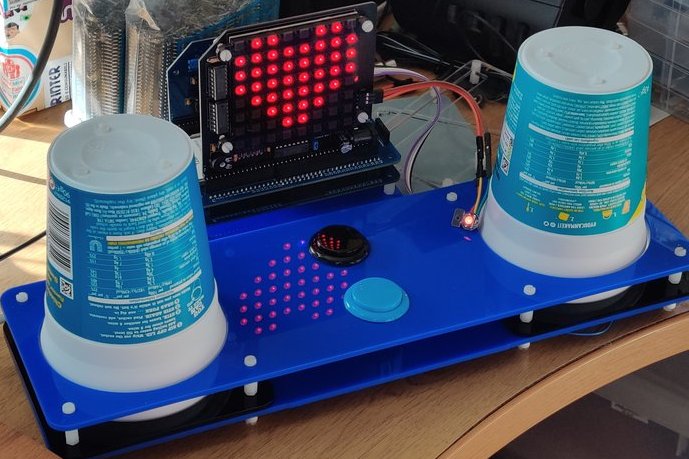
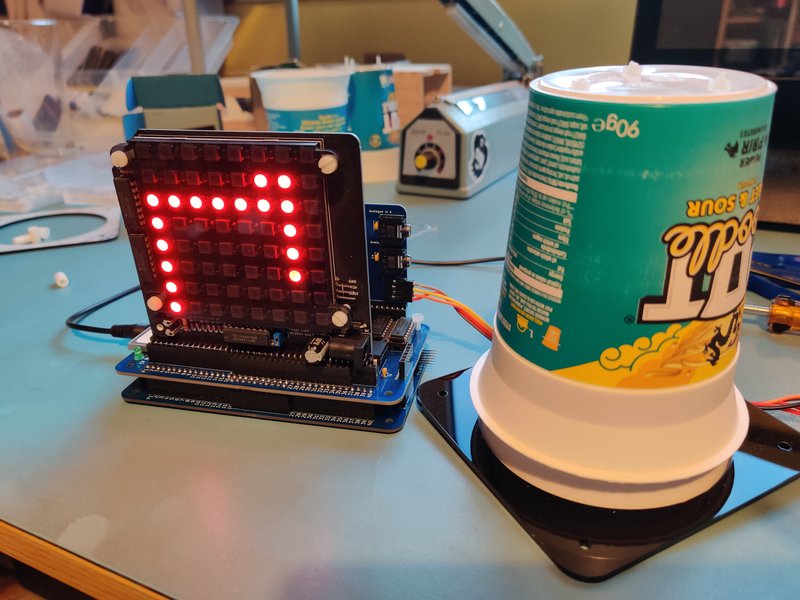
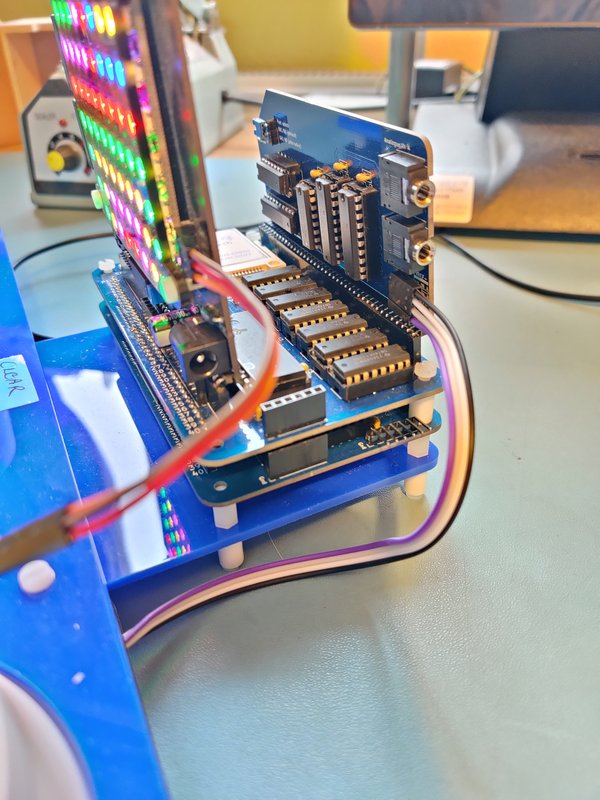
Shielas software worked great! Burning this on to ROM meant that it just ran on startup without any faffing at all. And with a t-shaped frame that housed the two pots, the buttons, and an RC2014 Mini with NeoPixel Module as well as the Dual Paddle Analogue Module it was a really nice self contained unit.
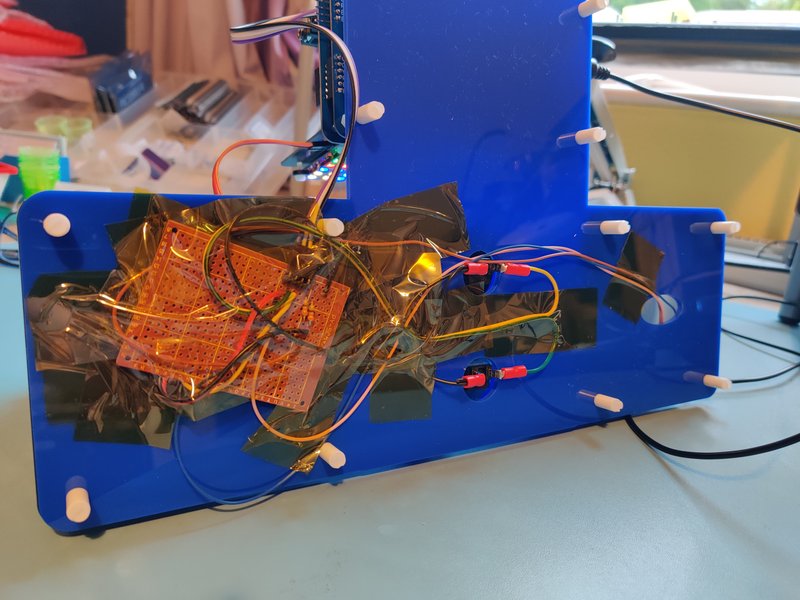
Things aren’t quite so neat underneath as the wiring for the pots and switches are all routed to a prototype board held together with Kapton tape. But nobody ever looks underneath, right?


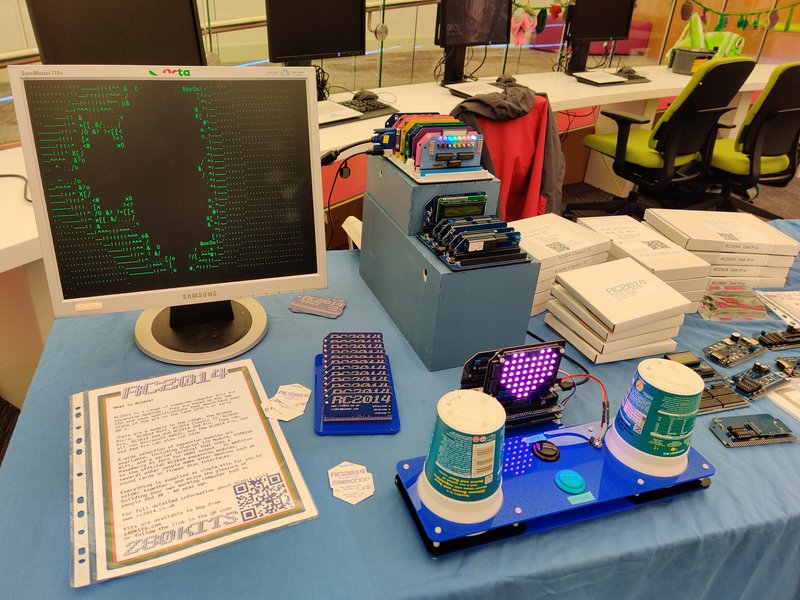
How did it go? Great! As always, Liverpool Makefest was a great day out. The folks in Liverpool seemed to instinctively get it straight away. Some people spent a while creating their own Mona Lisa, and others tried teamwork with one person controlling the X axis and the other controlling the Y axis. Nothing broke down or needed restarting and it is all ready for the next event. If anything, the only failing was that it worked too well that nobody particularly asked how it was working, so I didn’t get to talk about the analogue module too much. But at least I got a blog post out of it :-)
The Dual Paddle Analogue Module and the NeoPixel Module 8×8 Matrix are available now on z80kits.com