The ESP8266 Wifi Module comes with ESP-Link firmware from JeeLabs preinstalled. Before it can be used, it must be connected to your wifi network. You can then telnet to your RC2014 from your PC or laptop. The wifi setup only needs to be done once, unless you need to move it to a new network.
Initially, the ESP8266 sets itself up as a wireless access point with ESP in its title. You need to connect to this access point. Personally, I find a mobile phone easier for this, but the same steps apply for a laptop or PC.
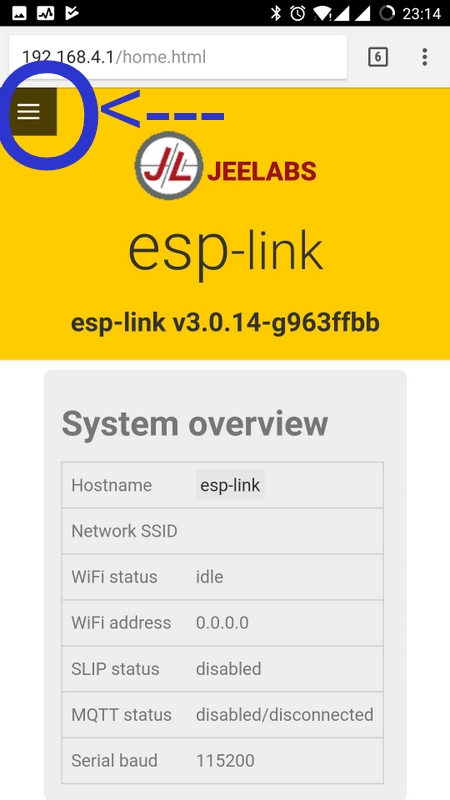
Once connected to the access point, use your browser to go to http://192.168.4.1
From the home page, set the Conn LED to GPIO4 and the Serial LED to GPIO5. If the RX pull-up box is ticked, untick this too.

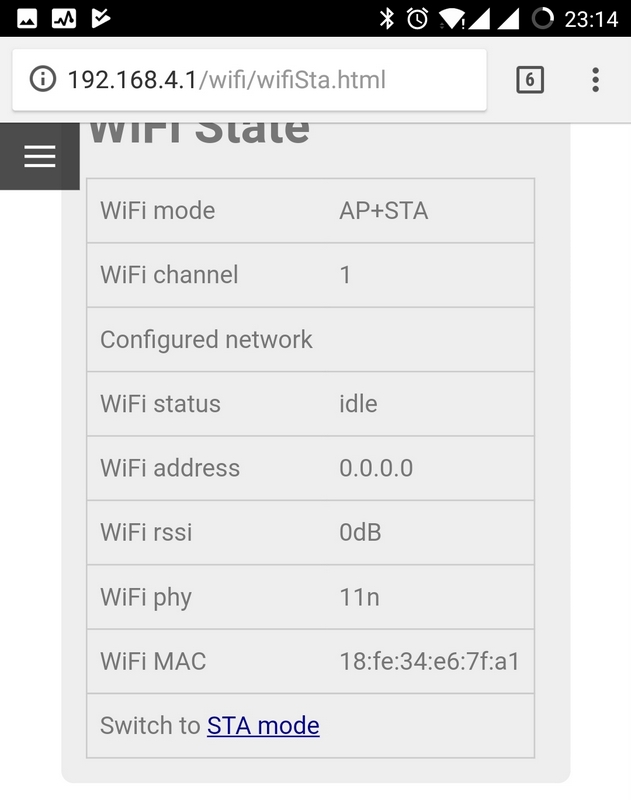
Then go to the menu and select Wifi Station. From this page, click Switch to STA mode
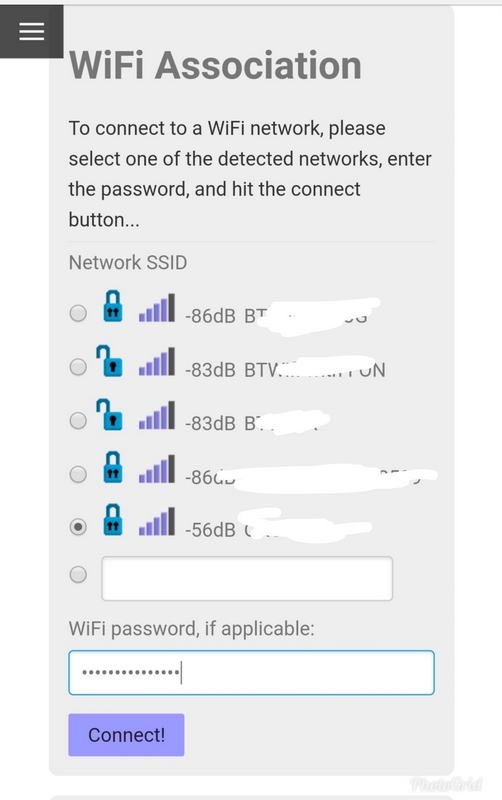
Then find the wifi network you want to connect to, enter the password and then click connect.
The ESP8266 will then reboot and connect to your local network. If you look at your router admin page for connected devices you should see the IP address this module has picked up. (If you don’t have access to your router, you can connect a FTDI cable to the ESP Wifi Module, and put the bottom run/program jumper to the right, and you will be able to see the boot up messages and IP address from a serial terminal).
Then, to access your RC2014, simply fire up a telent session and connect to this IP address.