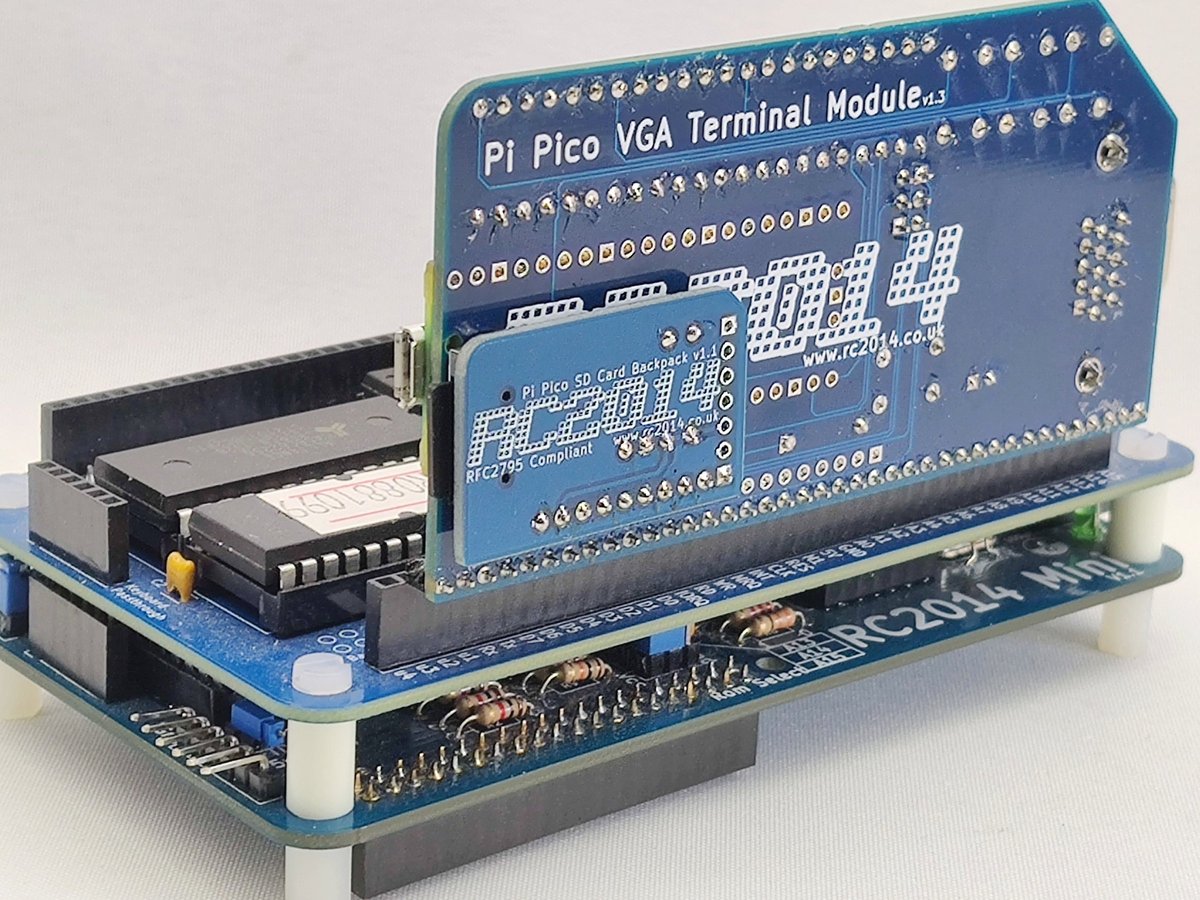
The Pi Pico SD Card Backpack is a simple add-on board for the Pi Pico VGA Terminal that allows a Micro SD card to be added. This upgrade board brings the functionality closer to that of the RP2040 VGA Terminal and is supported in PicoTerm from version 1.6.0 onwards.
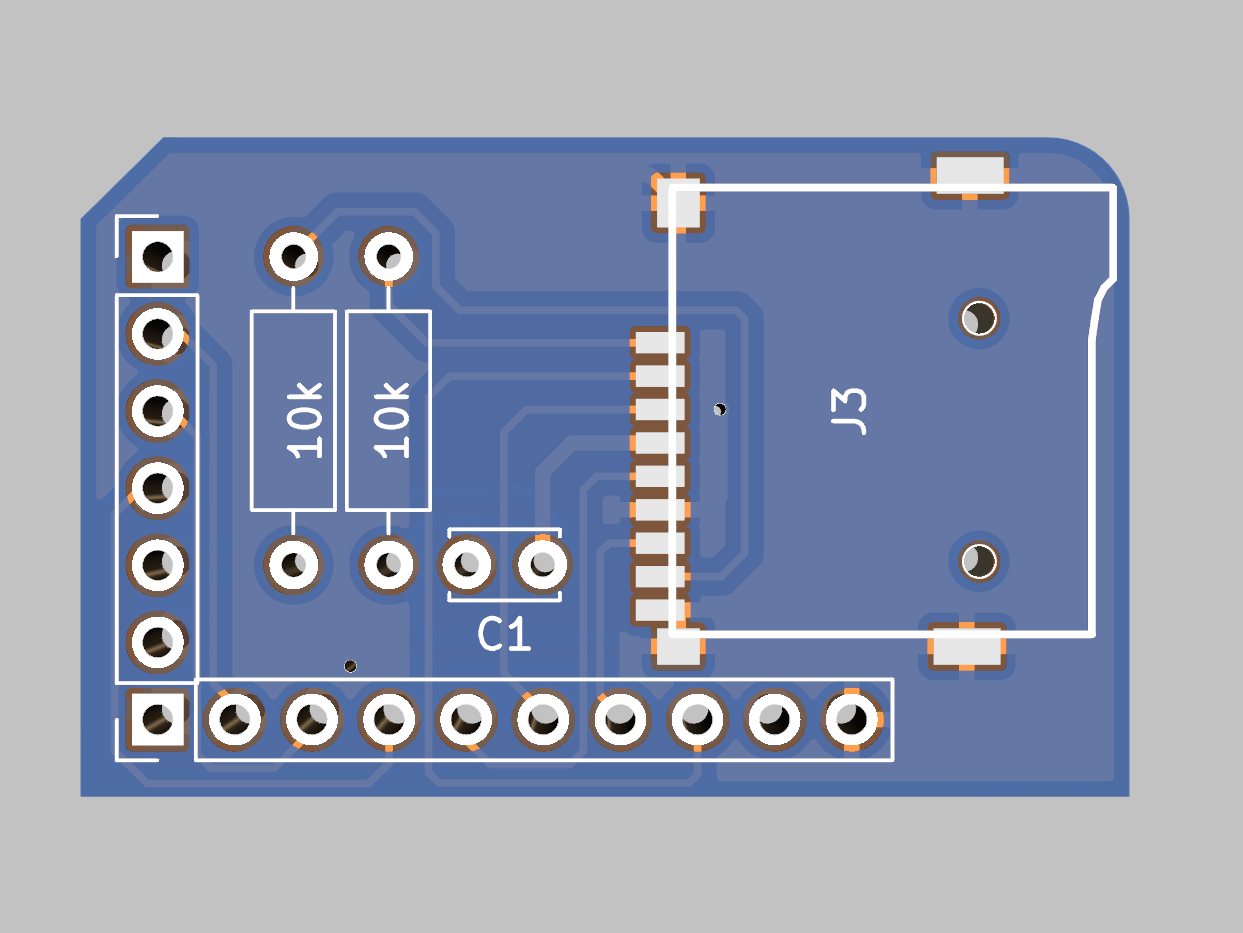
The “backpack” is so named because it sits on the back of the Pi Pico VGA Module, connecting through to the 10 pin GPIO header exposed on that board. GPIO05 (CS) , GPIO26 (SCK), GPIO27 (MOSI) & GPIO28 (MISO), along with 3v3 and Ground go to the SD socket. Unused GPIO signals and the power lines are routed out the 6 pin header at the back. DAT1 and DAT2 are unused on the Micro SD card and pulled high with 10k resistors.

Click link to pdf schematic
Assembly
Start by soldering the Micro SD socket. Adding some solder to one pad first, placing the socket on the board and heating that pad to secure one pin first is the easiest way to start. Then just a little bit of solder added to each of the other pins and shield tabs will finish it off. Check with a magnifying glass for shorts or dry joints.

The resistors are straight forward and go on the same side as the SD socket. The capacitor also goes on the same side, but leave this a couple of millimetres off of the PCB so that it can be laid flat against the board when soldered. The 10 pin header also go on the same side with the short side of the pins going through the board.
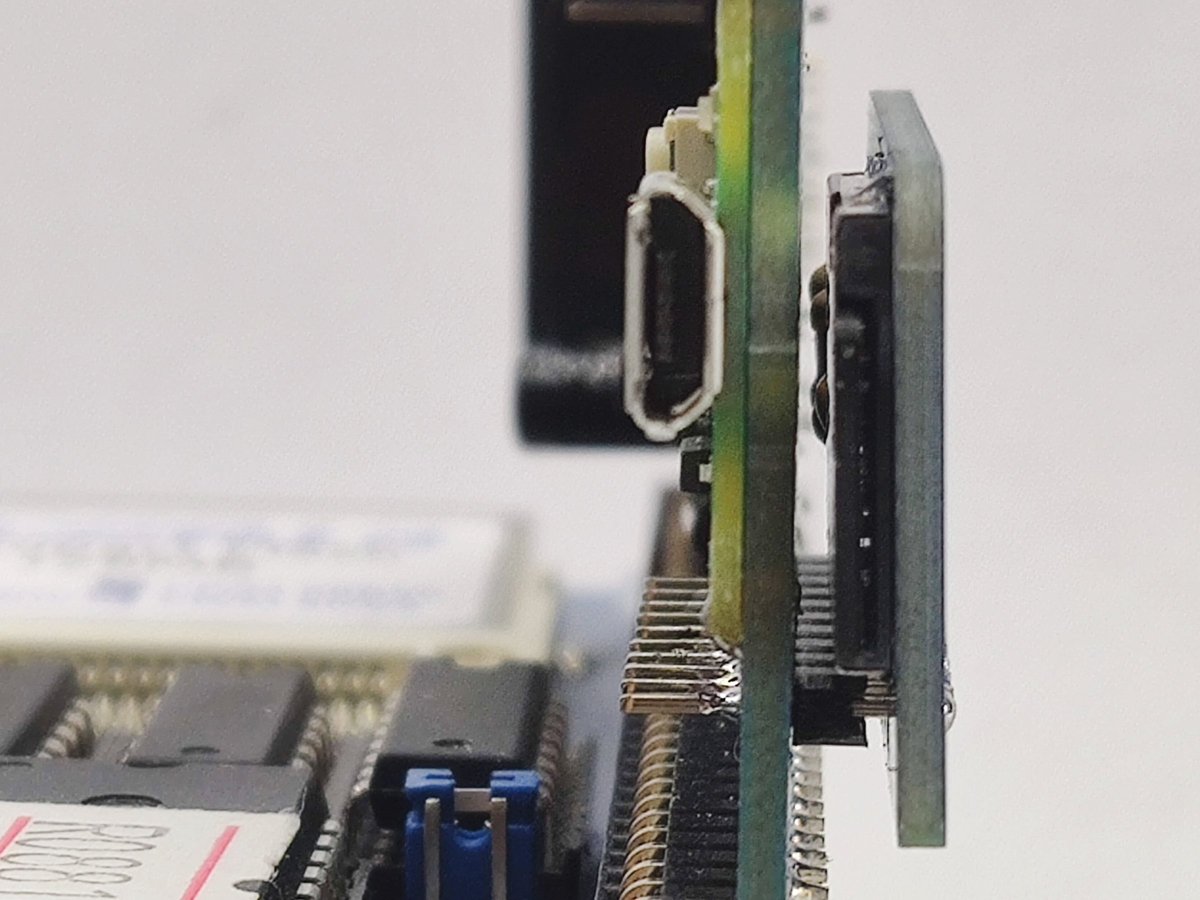
When attaching the complete backpack to the Pi Pico VGA Terminal, insert the pins through the back of module and solder them from the side with the Pi Pico on. Ensure that the backpack is parallel with the module so that nothing gets shorted out on the SD sockets shield.
Software
Because the Pi Pico SD Backpack uses the same GPIO pins as the RP2040 VGA Terminal, PicoTerm software from 1.6.0 that uses a SD card will work with this. Please note that at time of launch, this software is rudimentary. Future updates may well include alternative font support, loading and saving keystroke macros, config files, and maybe printer emulation. However, these features are yet to be written.
If you wish to use MicroPython to test the SD card, then load the MicroPython u2f file on your Pico, along with the sd card library, and something like this will work fine
import machine
import sdcard
import uos

# Assign chip select (CS) pin (and start it high)
cs = machine.Pin(29, machine.Pin.OUT)

# Intialize SPI peripheral (start with 1 MHz)
spi = machine.SPI(1,
                  baudrate=1000000,
                  polarity=0,
                  phase=0,
                  bits=8,
                  firstbit=machine.SPI.MSB,
                  sck=machine.Pin(26),
                  mosi=machine.Pin(27),
                  miso=machine.Pin(28))

# Initialize SD card
sd = sdcard.SDCard(spi, cs)

# Mount filesystem
vfs = uos.VfsFat(sd)
uos.mount(vfs, "/sd")

# Create a file and write something to it
with open("/sd/test01.txt", "w") as file:
    file.write("Hello Backpackers!\r\n")
    file.write("This is a test\r\n")

# Open the file we just created and read from it
with open("/sd/test01.txt", "r") as file:
    data = file.read()
    print(data)
Bill of Materials

1 x Pi Pico SD Card Backpack PCB
1 x Micro SD Card Socket
1 x 10 Pin Header
1 x 100nf Capacitor
2 x 10k Resistor