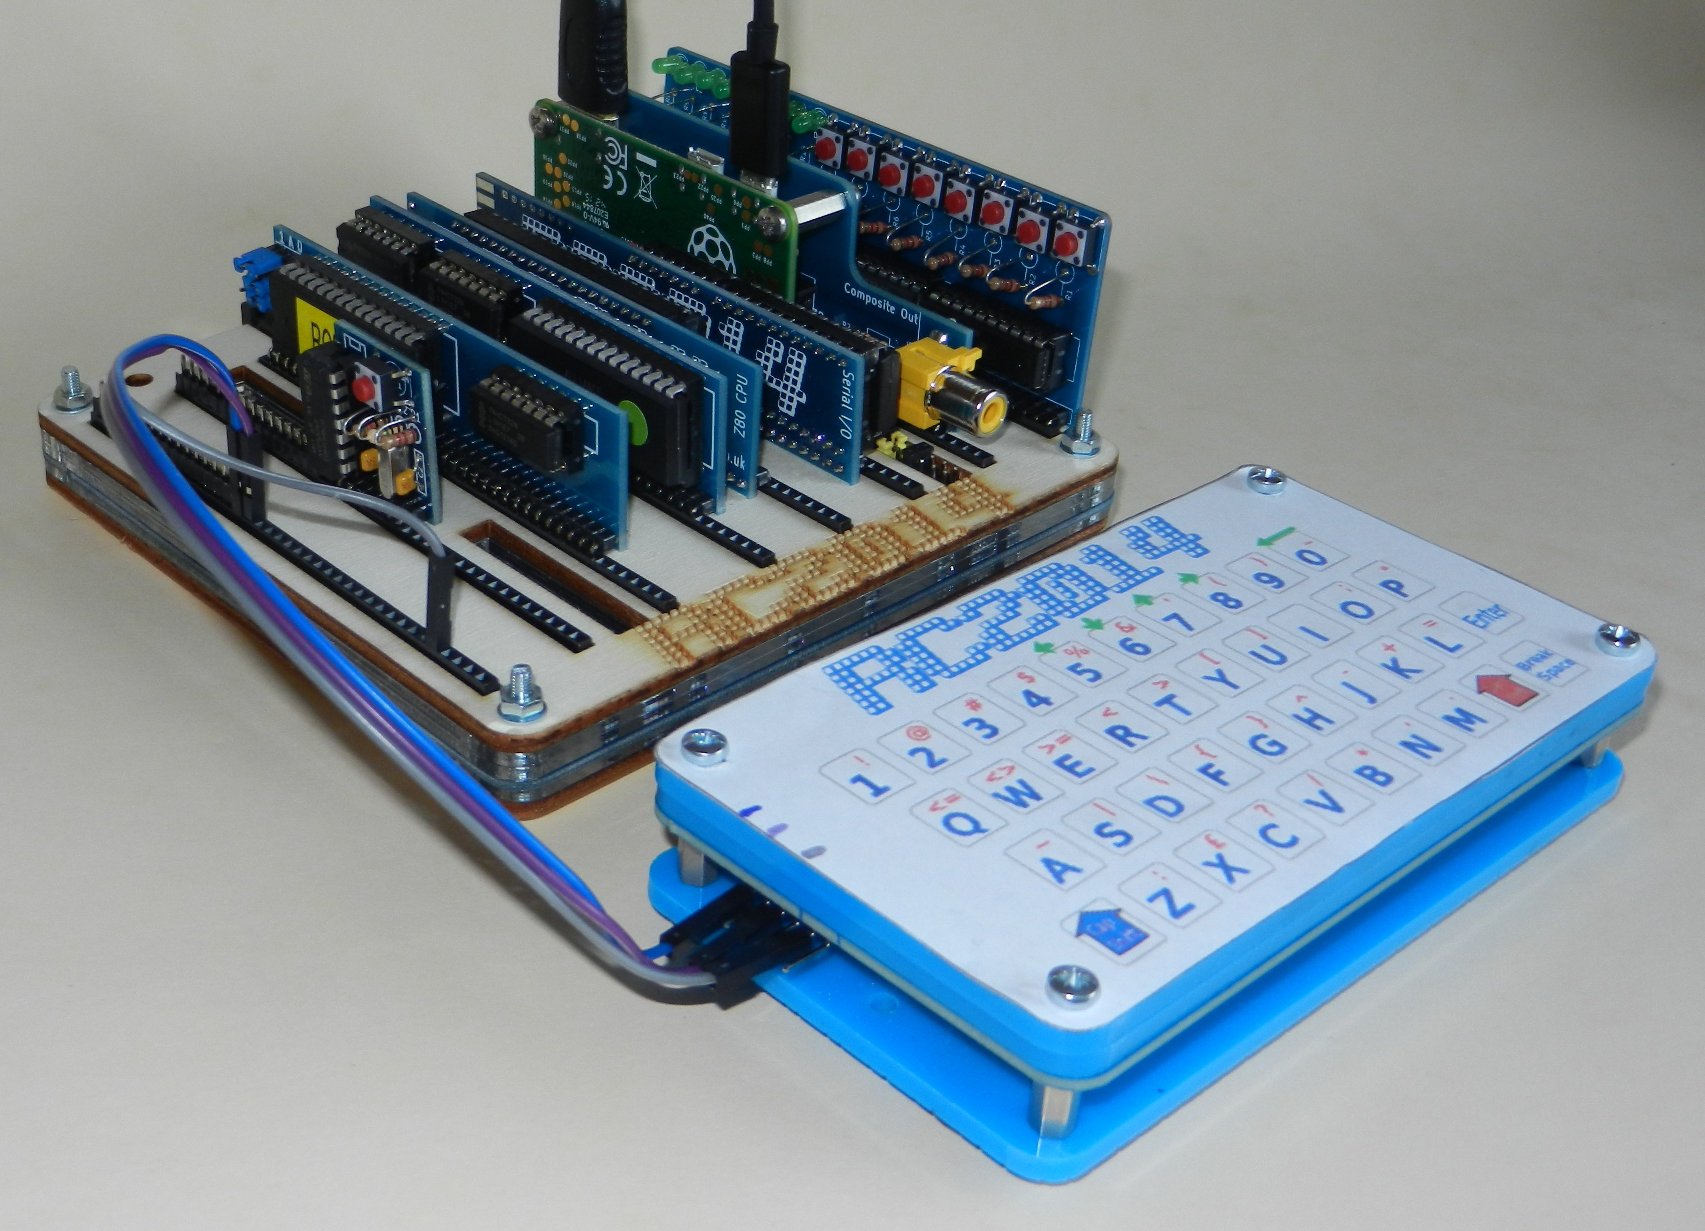
The RC2014 works great with an FTDI lead connected to a laptop. And with the Raspberry Pi interface module, you can use a USB keyboard to enter data. One of the things I felt was missing though was having it’s own little dedicated keyboard. So here it is
This is a universal keyboard that can be used in any one of three different ways;
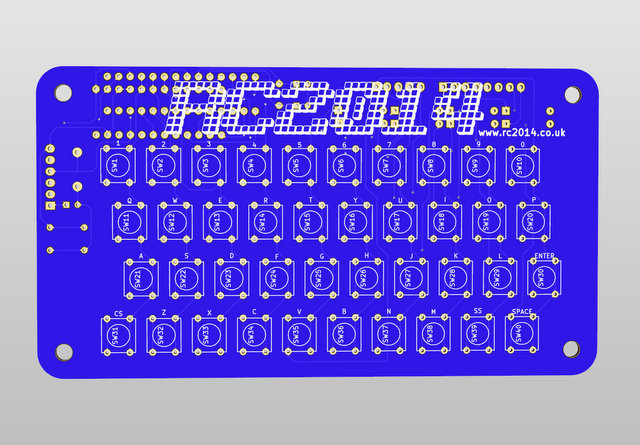
- Traditional matrix of 8 x 5 – Same layout as ZX81, ZX Spectrum, Jupiter Ace and more)
- Serial ASCII output – 115,200baud by default, same as RC2014)
- USB Keyboard – Plug in to any PC or tablet etc and is recognised as a keyboard
Due to using the wrong footprint on the PCB, however, the USB feature (to be implemented by an Arduino Pro Mini) needs some “creative” way to connect the Pro Mini!

The schematic really is very simple. There is an 8 x 5 matrix laid out in a 4 x 10 pattern. These go via 8 diodes to an 8 and 5 way connector. If you are using this with an old retro computer, or doing your own decoding, this is all you need.
These row and column pins also extend to an Atmel ATMEGA328 (Arduino Uno) socket and an incorrectly sized Arduino Pro Mini footprint. The ‘328 needs a clock circuit consisting of a couple of 22pf capacitors and 16Mhz crystal, and a reset circuit with 10K resistor, 100nf capacitor and reset switch. There is a 6 pin programming headers which also works as the serial output.
If connecting to an RC2014, you will only need to connect pins 1,3& 5 (Gnd, 5v & Tx) of the keyboard to pins 17, 18 & 38 of the RC2014 backplane, or to pins 1, 3 & 4 of the Serial I/O board.
If using a Pro Mini to connect to a PC, laptop or tablet, you will just need to connect a USB cable between the Pro Mini and your device.
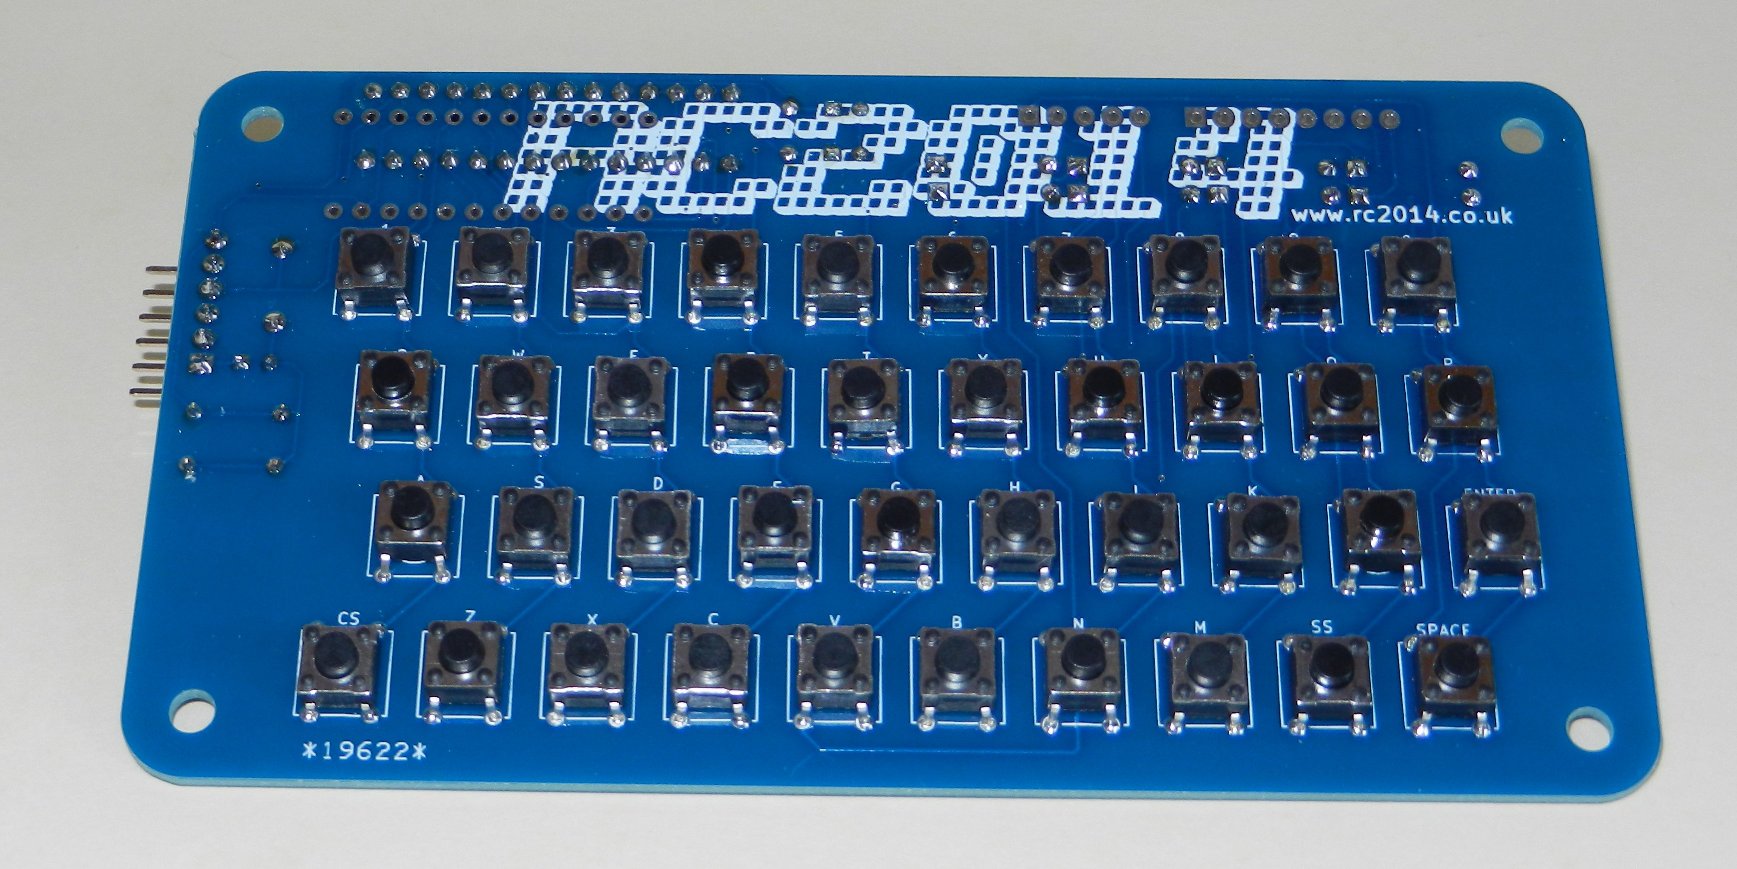
Top side of keyboard with 40 tactile switches in place
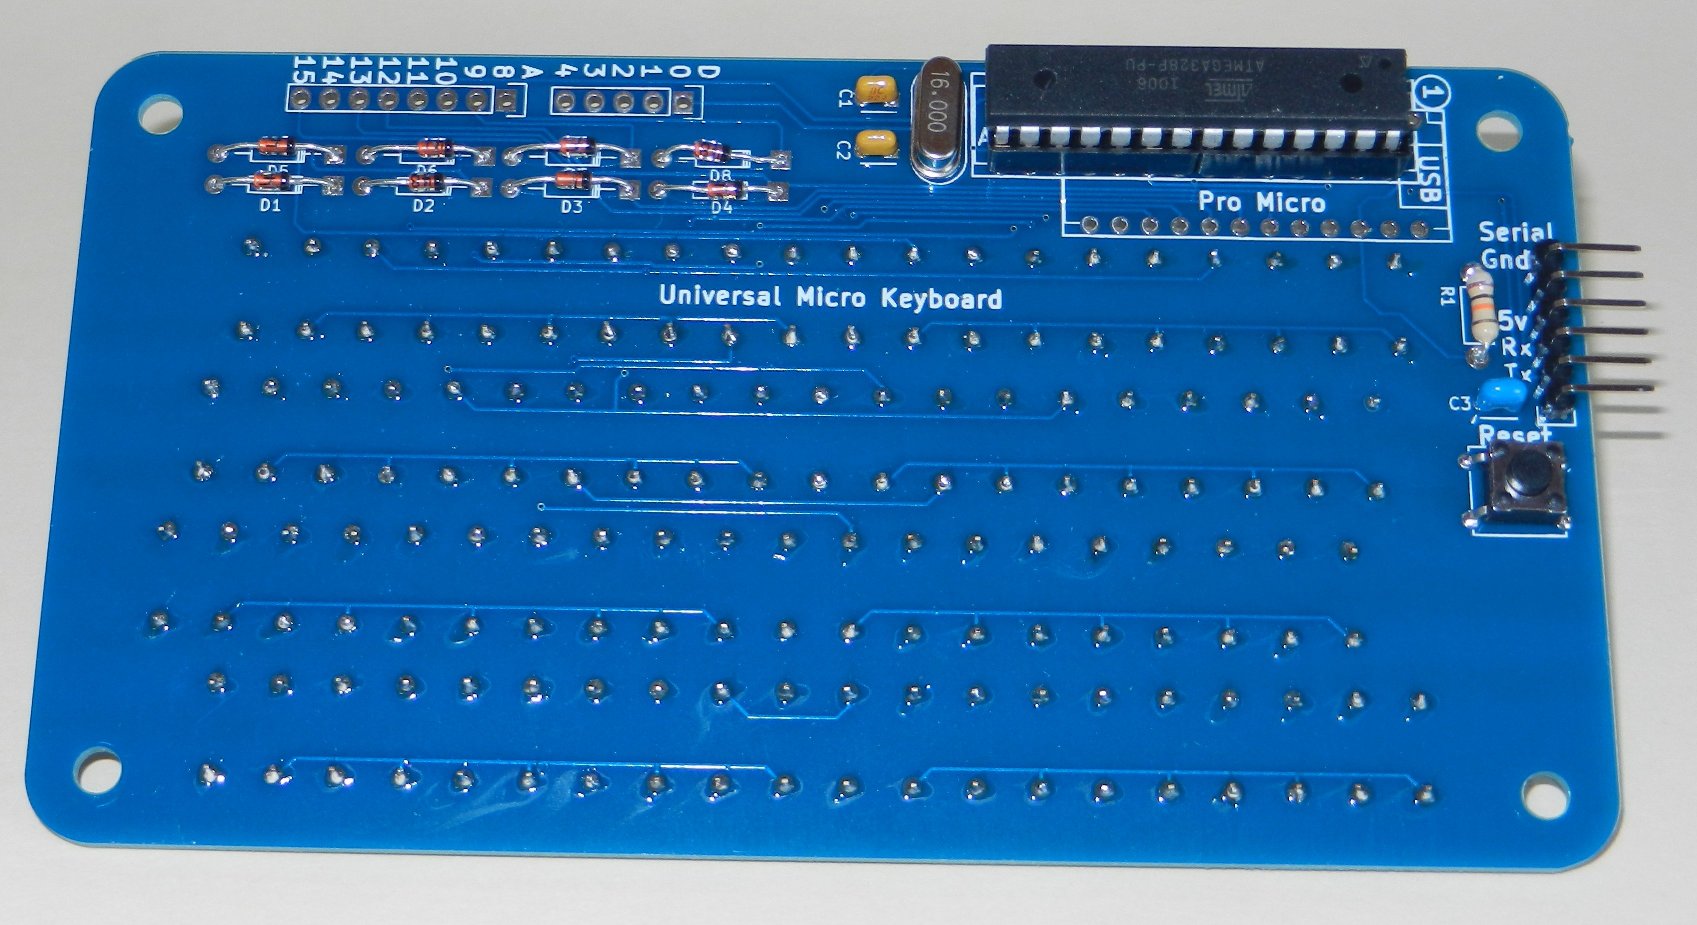
Underside of keyboard with the ATMEGA328 and supporting circuitry for serial output
The code is available on Git Hub (https://github.com/semachthemonkey/RC2014-Keyboard). This code currently supports 2 modifier keys so each key has 3 functions – typically lowercase, uppercase and a symbol. The baudrate and keyboard layout are easily modifiable if you wish to do so.
The tactile switches work fine, and feel pretty good to press – however, a lasercut support and printed top feels even better and allows you to see what each key does. These files are available on Thingiverse (http://www.thingiverse.com/thing:1548816)
Buy one here
Bill of Materials – Matrix Keyboard
- 1 off RC2014 KEYBOARD PCB
- 1 off 8 pin RA header
- 1 off 5 pin RA header
- 40 off Tactile Switch
- 8 off 1N4148
Bill of Materials – Serial Keyboard
- 1 off RC2014 KEYBOARD PCB
- 1 off 6 pin RA header
- 1 off 28 pin narrow DIL socket
- 1 off ATMEGA328
- 1 off 16Mhz Xtal
- 2 off 22pf ceramic cap
- 1 off 10k Resistor
- 1 off 100nf capacitor
- 41 off Tactile Switch
- 8 off 1N4148
Bill of Materials – USB Keyboard
- 1 off RC2014 KEYBOARD PCB
- 1 off 24 pin wide socket to Pro Mini adapter
- 1 off Arduino Pro Mini
- 1 off 10k Resistor
- 1 off 100nf capacitor
- 41 off Tactile Switch
- 8 off 1N4148