Since the first days of selling RC2014 kits, I’ve been cutting resistors off of bandoleers. Depending on the kit, they might be singular, or in groups of 3, 4, 5 or 8. To cut off a single resistor with a pair of scissors is very quick and simple. However, doing it time and time and time again, or having to count to cut them in to blocks of 5 can get time consuming and monotonous. Of course, there are industrial machines to automate these, but they cost a lot of money and are designed for doing thousands per day.
Then there are more hobby level machines, like this one from Oomlout. If I had a laser cutter, some servos, an Arduino and a few other bits, I could make one of these. So, when I purchased a laser cutter recently, building one of these was on my to-do list.
At some point, the redundancy became obvious. Why use a laser cutter to make a cutting machine – when the laser cutter is, itself, a cutter! So, 5 minutes with InkScape and I had a basic template ready to test

The template consists of 2 parts. The first, larger piece goes on the bed of the laser cutter. A strip of resistors is decanted on to the firsts part so that the resistors themselves sit in the holes running down the middle
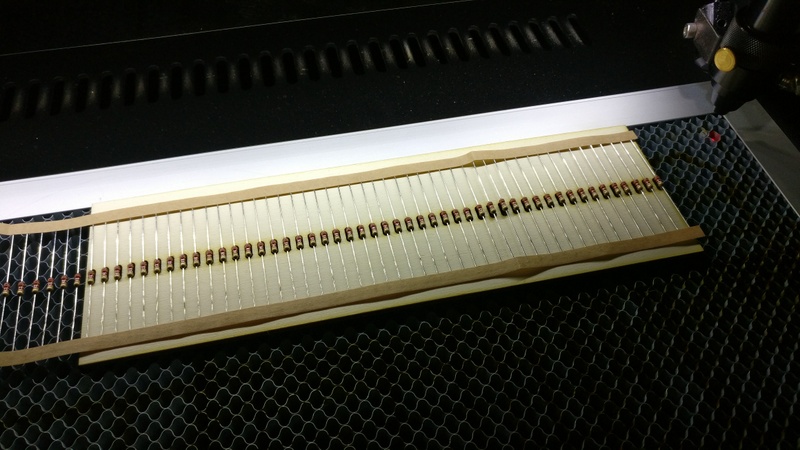
The second half of the template then clamps the resistors in place and is held down with magnets (Note that the following photo was taken after they were cut!).
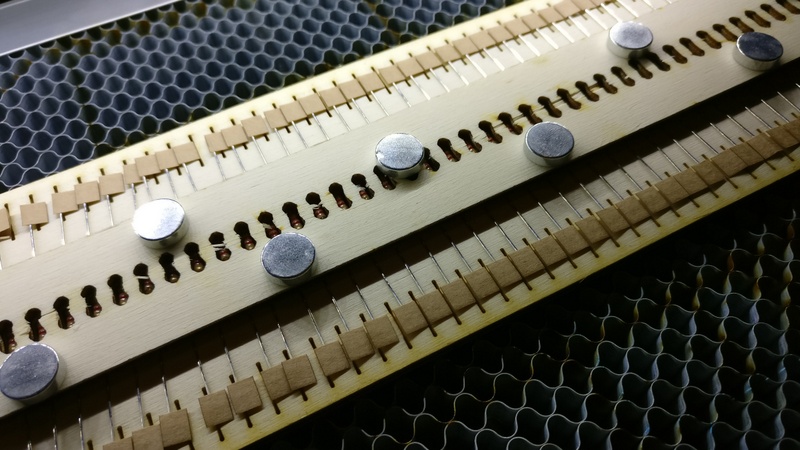
The laser cutter then cuts the tape! Depending on the template, this could be in groups of 1, 2, 3, 4, 5, 8 resistors.

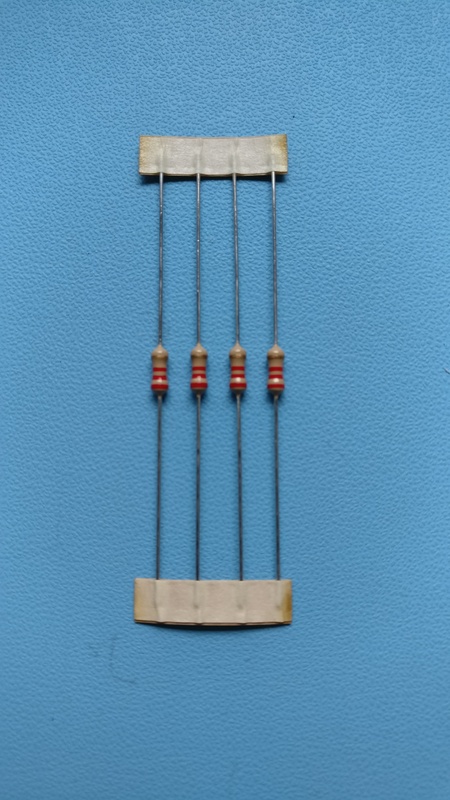
And voila! Precision laser cut resistors!
The dxf file for this is available to download on Thingiverse so you can laser cut your own resistors.
This is the first iteration of this, and it works surprisingly well. Set up time isn’t too long, but if you only need a few resistors cut off, you’re better off doing them the old fashioned way with scissors. But for running off a batch of a couple of hundred or more, it’s certainly quicker and easier.
The lower part of the template will get repeatedly cut on the intersection of the resistor tape, and sooner or later this will need replacing. When that happens, I’m going to replace it with a much longer version, so I can do a lot more in one go. I’m also wondering about having a few tapes in parallel for even more speed – but this might be at the risk of mixing up different value resistors.
So, the next time you get a RC2014 kit, just take a moment to marvel at the precision at which your resistors have been trimmed off of the tape!