Retro Challenge 10/2016 – Still a work in progress

So, who remembers my entry for Retro Challenge in January?  It was quite devoid of effort and results I think you’ll agree.

Well, this time around, I’ve taken that theme and pushed it even further!  Even less effort and much less result.

Since January, I have had a few opportunities to carry on with the ZX81 Module.  Because I wanted this to be a Retro Challenge project, I deliberately avoided doing any work on it, so I could save it all for October.  Well, October started and I was overwhelmed with non-Retro Challenge stuff.  But after a couple of weeks, I had a spare afternoon, and decided to dedicate this to the ZX81 Module!

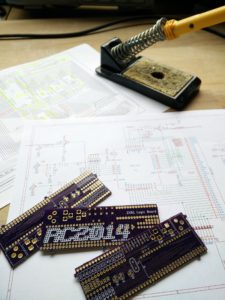
So, I dug out the PCBs I had manufactured in January and fired up the soldering iron;

retrochallenge10-2016_1

Time to wrack my brains and work out what my plans had been 9 months earlier.  I had failed to put any component values on the PCB, or even my Kicad schematics, so had to rifle through original ZX81 schematics to work out what these should be.

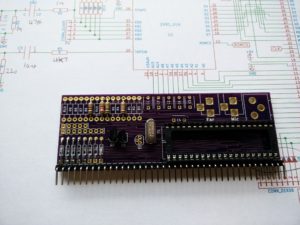
Now I knew what components I needed, it quickly dawned on me that I didn’t have very many of these at all.  This didn’t deter me though.  I fitted everything I had; IC socket, pin headers, some resistors and some transistors that may or may not be compatible;

retrochallenge10-2016_2

And that’s about it.  I have ordered the rest of the parts now, but not had an opportunity to fit them.  yet.

One thing I have learned from this experience though, is that if I get any opportunity or urge to work on this, then I will seize it.  Not wait until the next Retro Challenge.  If I’d done work on this months ago when I had the chance, then this would more likely be a trouble shooting / tweaking / developing challenge.

One other good thing that has come out of this though, is that when I started this in January, I had a few design changes or additions required for the RC2014 for it to work.  The Backplane 8 has the ability to add resistors between the CPU and the RAM.  The Universal Micro Keyboard has the right connections to work with a real ZX81 or this ZX81 Module (including diodes).  The CPU Module also now has BUSRQ, WAIT, NMI and WAIT pins broken out which is required for this.  These changes should all make things much easier.

Despite my poor efforts this time around, I have thoroughly enjoyed seeing what everybody else has achieved with their Retro Challenge.  Good work everybody else!

Retro Challenge 2016 – My Dog Ate My Homework

So, all the way back in deepest darkest December, I announced I would enter the Retro Challenge 2016 competition that ran throughout January.  Those of you that followed by blog or Twitter account when I did this in 2014 will know that I blogged and Tweeted relentlessly for the whole month, but, this time around, almost nothing.  Obviously, I’m keeping some secret about an amazing breakthrough or something, right?  Well, truth is, I’ve done almost nothing.

Things started well, and on 1st January, I designed a new backplane for the RC2014.  Although I hadn’t studied the circuit diagrams for the ZX81, Jupiter Ace or ZX Spectrum yet, I knew that there were resistiors between the Z80 CPU and other devices.  The stripboard backplane I’d been using had served me well, but it was time to progress to a better solution, and one that could be adapted better to my needs.  Knowing that PCB delivery times could be against me, I thought it best to crack on and get this  ordered.

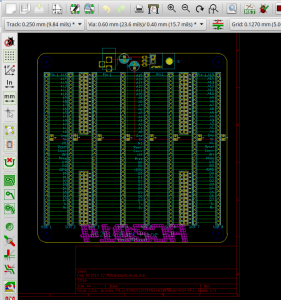
Screenshot from 2016-01-31 16:01:00

The basic circuit is very very simple – however, I wanted to get this just right, not only for Retro Challenge 2016, but for other possible RC2014 uses.  Essentially, there are 8 40 way connectors that are linked straight through – however, the data lines and address lines for the leftmost 2 connectors and rightmost 2 connectors are separated by a pair of pads.  These can either be shorted together for up to 8 commoned connectors, or have resistors soldered across them.  I also added a power connector and the option of either running 5v directly in to the board, or regulating a higher voltage down via a LM7805.

(more…)

Retro Challenge January 2016 – Preamble

So, you may well remember that I entered Retro Challenge 18 months ago, and what a fun crazy busy time that was!  Well, the January Retro Challenge competition is about to kick off in just over 2 weeks.

If you’re not familiar with Retro Challenge, shame on you!  But you can de-shame yourself by heading over to http://www.retrochallenge.org/ and seeing what it’s all about.  Essentially, it’s a month long bi-annual competition where the entrants set themselves a goal based around old school computing and blog, tweet and share their experiences.  The goals are pretty loose, as long as they are based on something from last centuary (modern emulators of old kit is fine).

The challenge I set myself was to take a breadboard based Z80 computer and bring it to life in modular PCB form in such a way that I could spell out my name on.  Have a look back through my blog to see how I did.  Spoiler —->

IMG_20140730_205950

(more…)

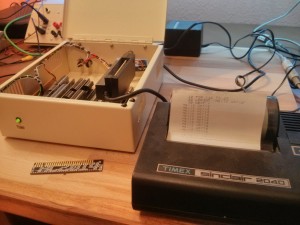
RC2014 with ZX Printer interface

My original plan had never been to design and build my own computer.  I had, however, planned to build a clone of the Sinclair ZX80, which has been on my bucket list of things to own for year, and which I had found plans for online.  Whilst collecting the parts and reading up on simple Z80 computers I got kind of sidetracked and ended up with the RC2014.

The print out shown was what was left from the last time this was connected to a ZX Spectrum!

The heart of the RC2014 is a Zilog Z80 CPU, which is the same one that Sinclair used in the ZX80, ZX81, ZX Spectrum and Z88.  If the ZX81 and ZX Spectrum can run a ZX Printer, then surely it follows that the RC2014 will be able to too?

(more…)

Retro Challenge – New IDEa

just a quick update about my Z80 development environment.

If you look down a couple of blogs, you’ll see that I found an online Z80 emulator and I’d written a couple of bits that executed in it, so I was going to do my Z80 learning and development on that.  However, there were two issues.  The first being that it didn’t run on Chrome on my Linux PC at home (but did on Chrome on Windows at work).  The second issue is that it isn’t a Z80 emulator, it’s a 8080 emulator.  I didn’t think this would be a problem as they pretty much run the same instruction set, although the 8080 has a sub-set of the Z80 (well, technically, as the 8080 came first, the Z80 has an expanded instruction set), and I quite quickly came across an instruction that wasn’t supported.  Bugger!  That’s messed up that plan.

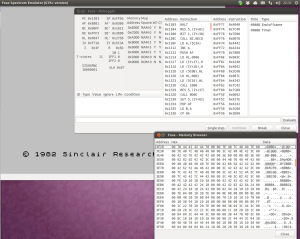
Then I remembered I have Fuse which is a ZX Spectrum emulator running on my Linux PC.  There are oodles of menus and options which I’ve never looked at, but thought it worth a poke (no pun intended) about with.

Screenshot from 2014-07-16 22:31:09 (more…)

Retro Challenge – Font Selection

So, if I’m going to write my name on a bunch of 8×8 LED matrix displays, I have a couple of options; Write my name on grid paper, colour in the squares, convert it to binary and transpose it to hexadecimal.  Or… I could use a font that’s already out there.  Like the one that Sinclair used in the ZX Spectrum.

I’ve already got a copy of the Spectrum ROM, and, handily enough, all the characters are right at the very last part of the ROM address space (from 0x3D00 to 03FF), in consecutive blocks of 8 bytes.

I can see this coming in handy later! (more…)