After what felt like a lot of aimless bumbling around and poor progress on the first streamed game of Zork, I decided to take a peek at a walkthrough solution before playing this.
The last live stream finished off with me getting frustrated with not being able to undo a bolt at the Dam, despite having a wrench. A peek at the walkthrough mentioned pushing a yellow button in the control room first. Really? Like, how was I supposed to know that? Ok, I’ll admit that I hadn’t spotted any of the buttons in the control room (there was a lot of text bombarding me as I arrived in there), but if I had, I would have probably pushed all the buttons. I don’t know if you must push only the yellow one, or if pushing them all would render the bolt still unturnable, but if this is the level of puzzle I’m supposed to solve, then it’s unlikely that I’m going to make too much progress after this part.
So, instead, I decided to print off the first couple of pages of the walkthrough, and planned to just follow along with it.
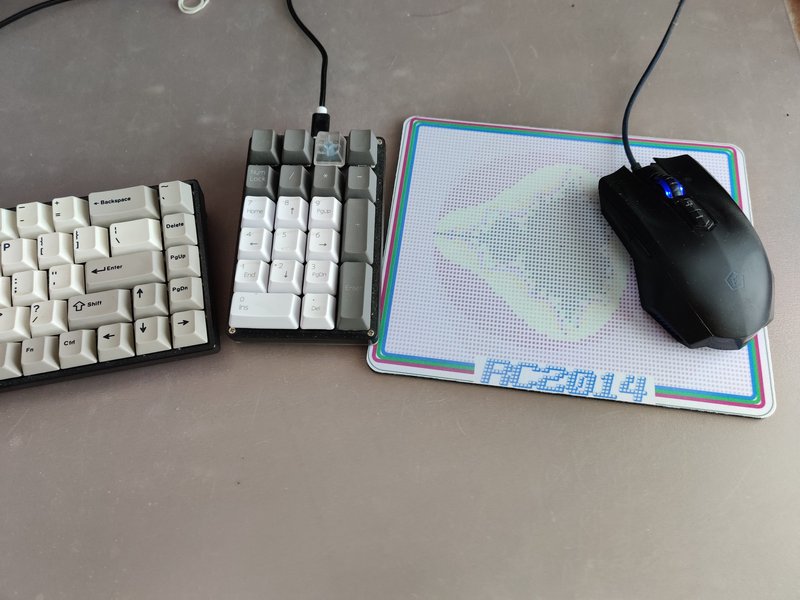
The live stream started at 7pm on Thursday evening, and the set up was the same as the previous one. The only difference was that I’ve now upgraded from the free version of Wirecast to a licence one with no interruptions. There was 5 viewers on YouTube and 4 on the text stream, although towards the end I spotted a tweet from a viewer that was unable to connect to the text stream (Sorry!), but I never found out if it was a problem at my end or his.
The first thing I wanted to do was test out the instructions on pushing the yellow button before undoing the bolt. Sure enough, this worked! However, there were a few other things that I’d missed out between the start and the dam. I could have possibly caught up with those in a different order, but decided to quit this game and start afresh.
Progress went well, and within an hour I had completed around 50% of the game. Some of the walkthrough was invaluable. I can imagine I’d have ended up stuck in the maze for ever, and probably unable to map it too, but when the walkthrough tells you to just go northwest, south, west, up, west, southwest, and northeast, it is much more enjoyable. Even following along on the map this was hard to work out.
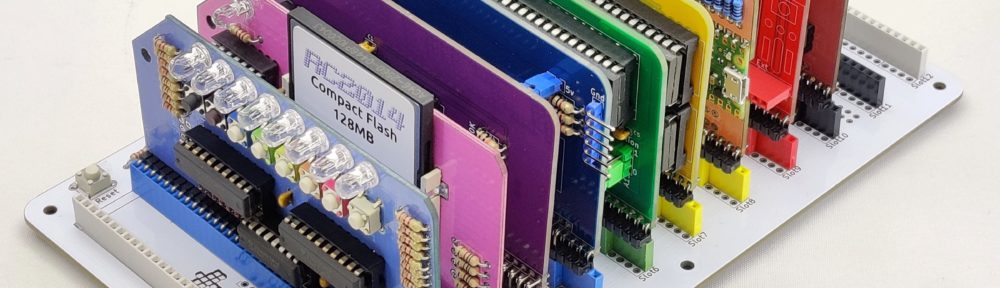
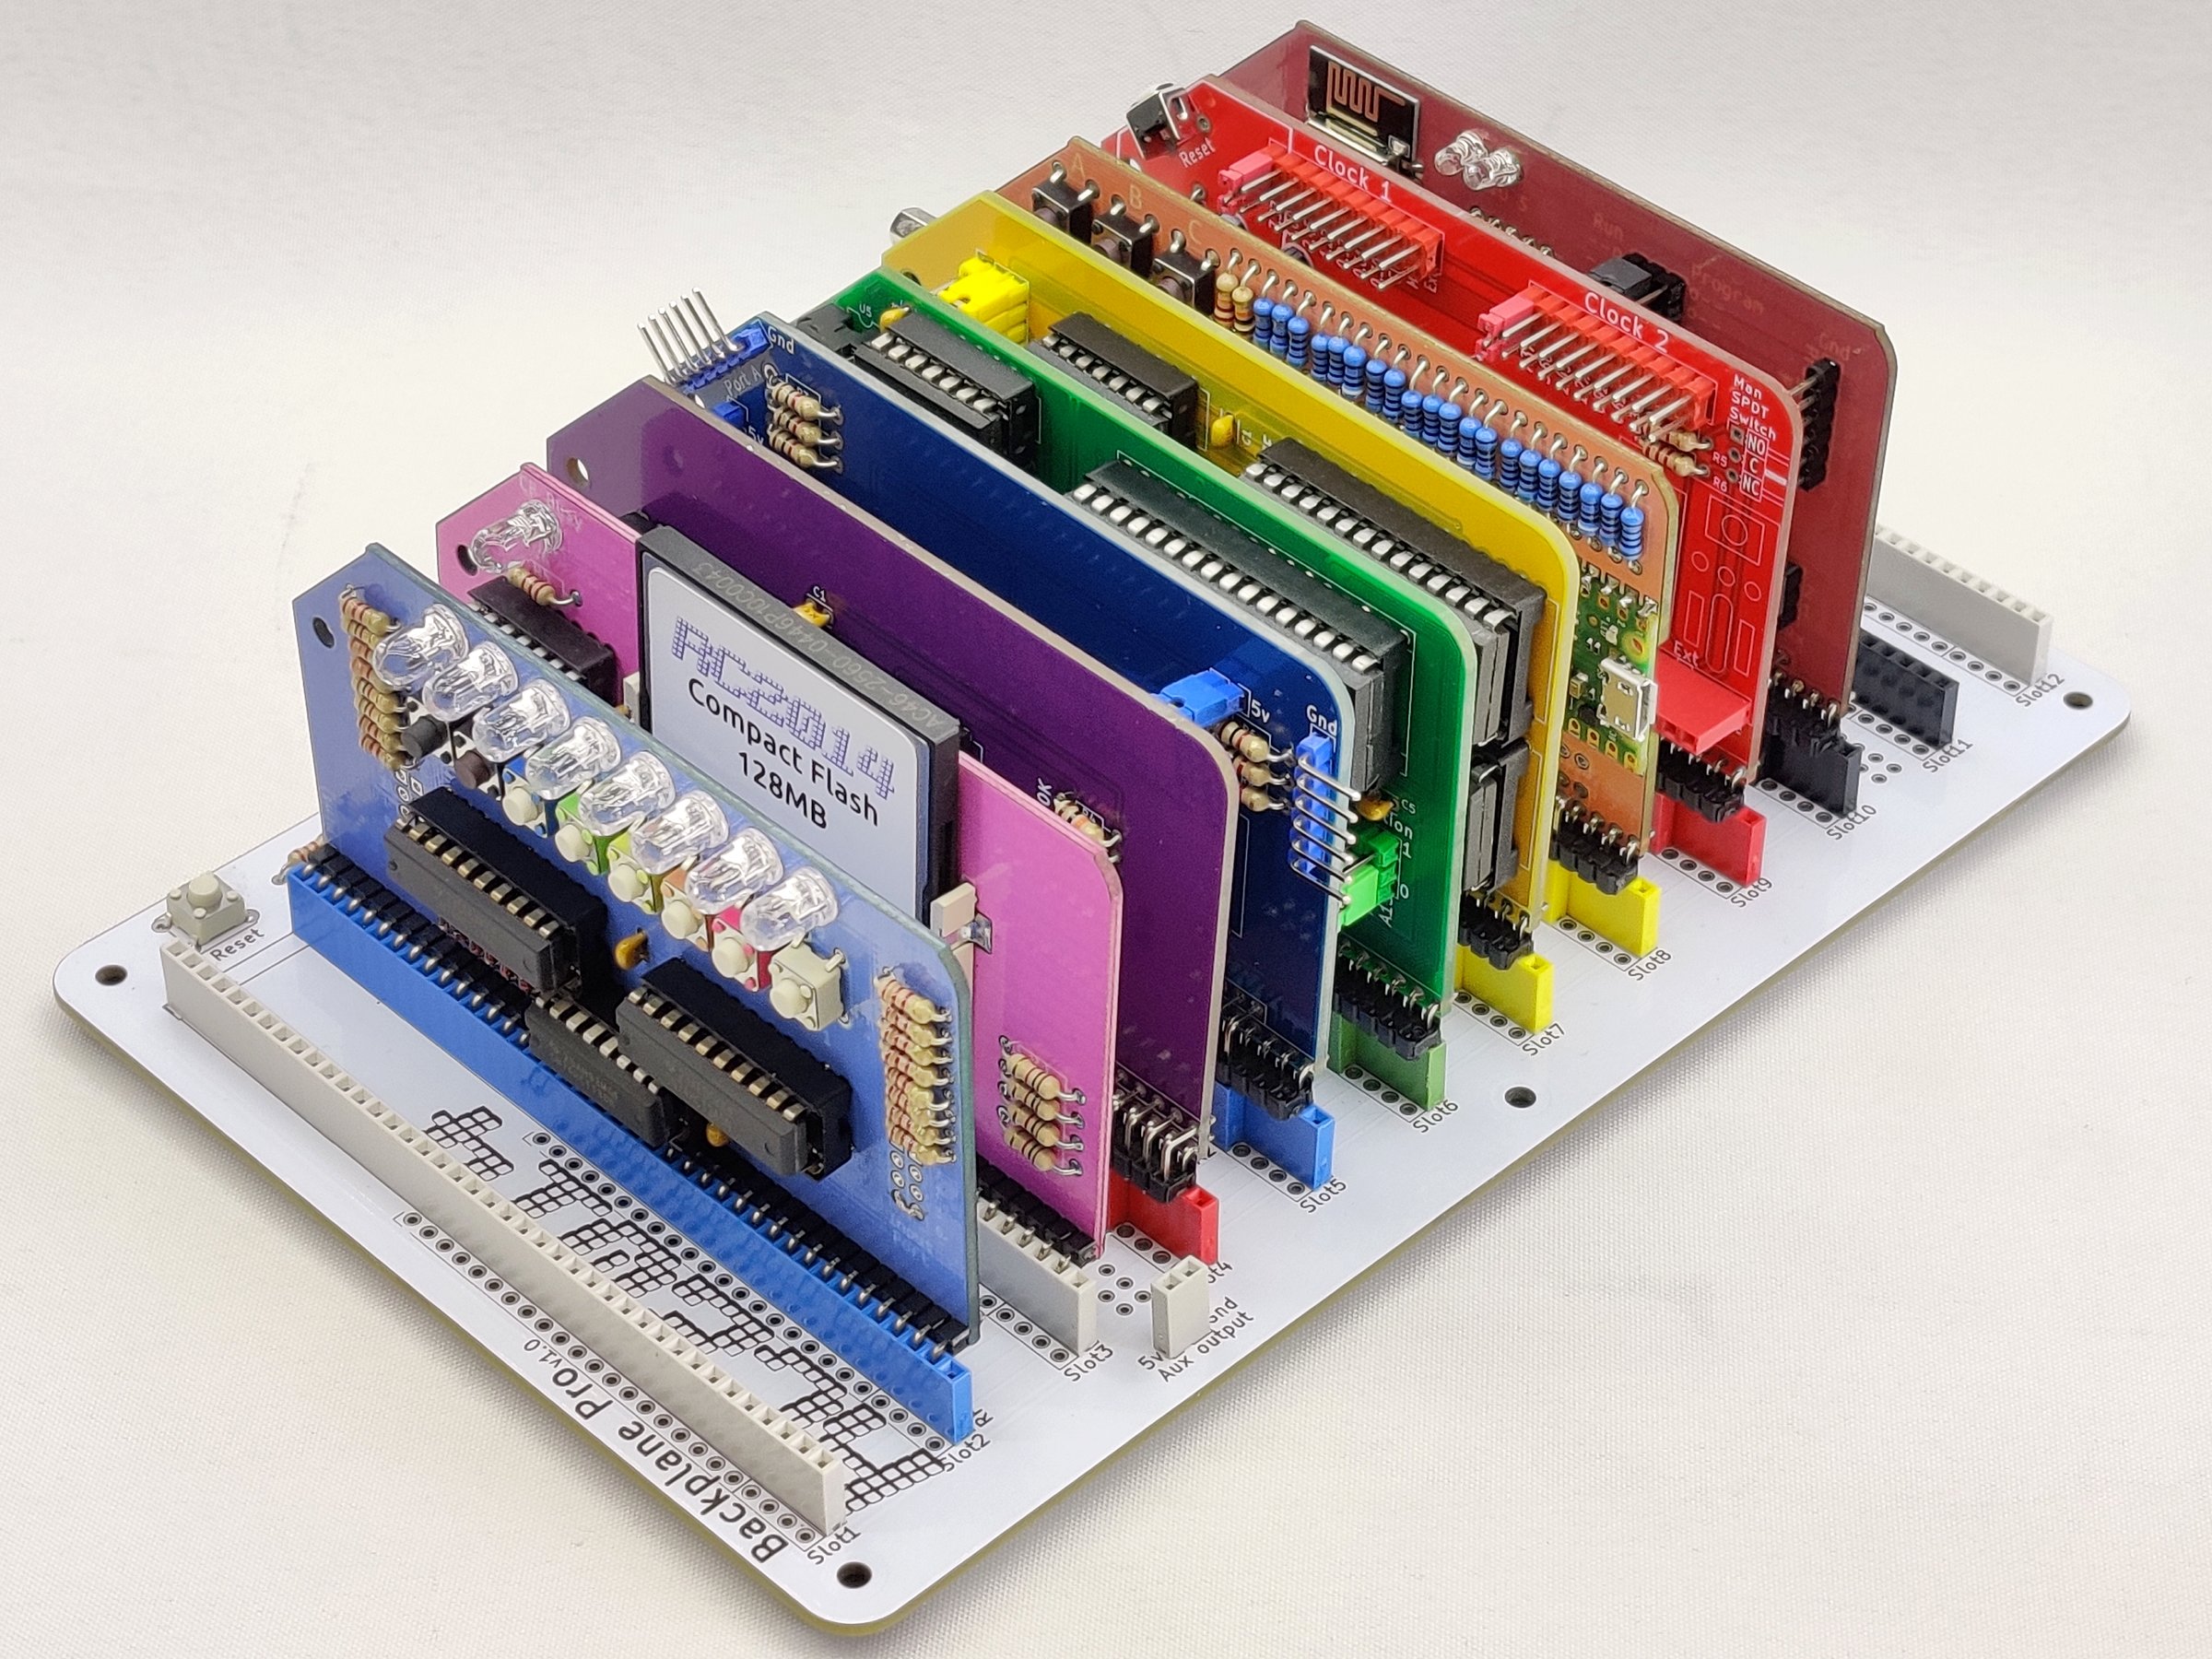
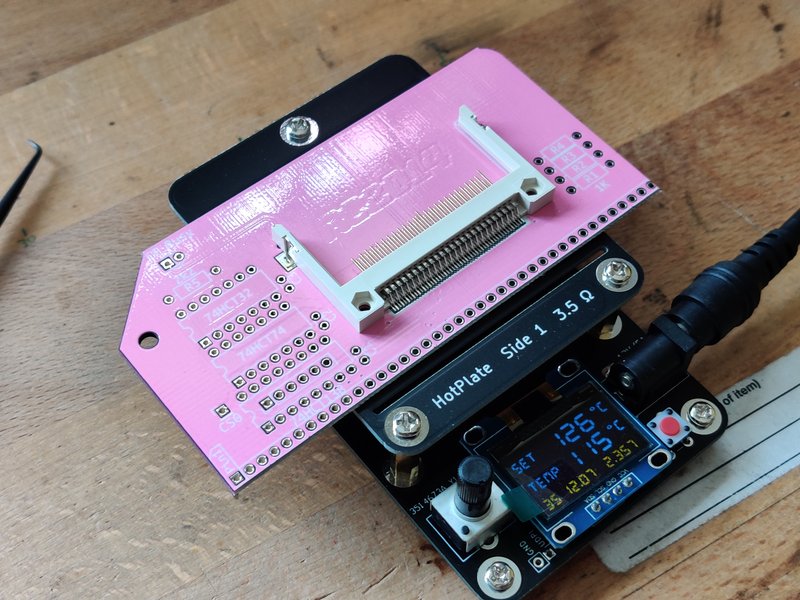
I feel like I’ve successfully completed the Retro Challenge I set myself, and I’m happy that things went pretty well. As I’ve mentioned before, I’m not much of a text adventurer, and I don’t think this experience has changed that. Zork was actually better than I thought it would be, and at some point I’ll play through the 2nd half of the walkthrough. The best part for me, however, was the technical side of things, and hooking up an ESP8266 as a wifi link for the RC2014. There seems to be a few different bits of ESP8266 software that will add value to the RC2014, so I’ll be developing a proper ESP8266 Module soon.
A big thanks to those that have followed along with this blog, via Twitter, and, of course, via YouTube and the text stream.
Transcript of this adventure here;
ZORK1
ZORK I: The Great Underground Empire
Copyright (c) 1981, 1982, 1983 Infocom, Inc. All rights
reserved.
ZORK is a registered t
>RESTORE
Load SAVE disk then enter file name.
(default file name is ZORK1.SAV).
Type <ENTER> to continue > ZORK1.SAV
Load Game Disk if it was removed.
Type <ENTER> to continue >
Failed.
>RESTORE
Load SAVE disk then enter file name.
(default file name is ZORK1.SAV).
Type <ENTER> to continue >
Load Game Disk if it was removed.
Type <ENTER> to continue >
Failed.
>QUIT
Your score is 0 (total of 350 points), in 0 moves.
This gives you the rank of Beginner.
Do you wish to leave the game? (Y iY
G>DIR
G: ZORK1 COM : ZORK1 DAT : ZORK2 COM : ZORK2 DAT
G: ZORK3 COM : ZORK3 DAT : FIRSTGO
G>L� �ZORK1
ZORK I: The Great Underground Empire
Copyright (c) 1981, 1982, 1983 Infocom, Inc. All rights
reserved.
ZORK is a registered tRESTORE FIRSTGO
I don't know the word "firstgo".
>RESTORE
Load SAVE disk then enter file name.
(default file name is ZORK1.SAV).
Type <ENTER> to continue > FIRSTGO
Load Game Disk if it was removed.
Type <ENTER> to continue >
Ok.
>LOOK
Dam
You are standing on the top of the Flood Control Dam #3, which
was quite a tourist attraction in times far distant. Thered dam.
There is a control panel here, on which a large metal bolt is
mounted. Directly above the bolt is a small green plastic
buLOOK
Dam
You are standing on the top of the Flood Control Dam #3, which
was quite a tourist attraction in times far distant. There are
paths to the nortThe brown sack contains:
A leaflet
A ZORK owner's manual
A clove of garlic
There is a tour guidebook here.
There is a
>N
Dam Lobby
>N
Maintenance Room
>LOOK
Maintenance Room
This is what appears to have been the maintenance room for
Flood Control Dam #3. Apparently, this room has PUSH YELLOW BUTTON
Click.
>
I beg your pardon?
>S
Dam Lobby
>S
Dam
You are standing on the top of the Flood Control Dam #3, which
was quite a tourist attraction in timesI
You are carrying:
A sword
A tube
A wrench
A matchbook
A pile of plastic
A nasty knife
A brass lantern (prUSE WRENCH ON BOLT
I don't know the word "use".
>UNSCREW BOLT
I don't know the word "unscrew".
>UB� �NBOLT WRENCH
I don't know the word "unbolt".
>TURN BOLT
What do you want to turn the bolt with?
>TURN BOLT WITH WRENCH
The sluice gates open and water pours through the dam.
>E
Dam Base
>LOOK
Dam Base
You are at the base of Flood Control Dam #3, which looms above
you and to the north. The river Frigid is flowing by here.
AlonE
You can't go that way.
>S� �DIAG
I don't know the word "diag".
>DIAGNOSTIC
You are in perfect health.
You can be killed by a serious wound.
>SAVE
Load SAVE disk then enter file name.
(default file name is FIRSTGO.).
Type <ENTER> to continue > FIRSTGO2
Load Game Disk if it was removed.
Type <ENTER> to continue >
Ok.
>RESTART
Your score is 44 (total of 350 points), in 156 moves.
This gives you the rank of Amateur Adventurer.
Do you wish to restartY
Restarting.
ZORK I: The Great Underground Empire
Copyright (c) 1981, 1982, 1983 Infocom, Inc. All rights
reserved.
ZORK iOPEN MAILBOX
Opening the small mailbox reveals a leaflet.
>GET LEAFLET
Taken.
>READ LEAFLET
"WELCOME TO ZORK!
ZORK is a game of adventure, danger, and low cunning. In it
you will explore some of the most amazing terrN
North of House
You are facing the north side of a white house. There is no
door here, and all the windows are boarded up. ToN
Forest Path
This is a path winding through a dimly lit forest. The path
heads north-south here. One particularly large tree UP
Up a Tree
You are about 10 feet above the ground nestled among some
large branches. The nearest branch above you is above yourGET EGG
Taken.
>OPEN EGG
You have neither the tools nor the expertise.
>D
Forest Path
>E
Forest
This is a dimly lit forest, with large trees all around.
>W
Forest Path
>S
North of House
>E
Behind House
You are behind the white house. A path leads into the forest
to the east. In one corner of the house there is aOPEN WINDOW
With great effort, you open the window far enough to allow
entry.
>ENTER WINDOW
Kitchen
You are in the kitchen of the white house. A table seems to
have been used recently for the preparation of food. A p
>GET SACK
Taken.
>GET BOTTLE
Taken.
>OPEN SACK
Opening the brown sack reveals a lunch, and a clove of garlic.
>EAT GARLIC
What the heck! You won't make friends this way, but nobody
around here is too friendly anyhow. Gulp!
>W
Living Room
You are in the living room. There is a doorway to the east, a
wooden door with strange gothic lettering to the wOPEN TROPHY CASE
Opened.
>GET SWORD
Taken.
>GET LAMP
Taken.
>REMOVE RUG
The rug is extremely heavy and cannot be carried.
>PULL UP RUG
With a great effort, the rug is moved to one side of the room,
revealing the dusty cover of a closed trap door.
>OPEN TRAPDOOR
The door reluctantly opens to reveal a rickety staircase
descending into darkness.
>DOWN
You have moved into a dark place.
The trap door crashes shut, and you hear someone barring it.
It is pitch black. You are
>LIGHT THE LAMP
The brass lantern is now on.
Cellar
You are in a dark and damp cellar with a narrow passageway
leading north, and a crawlwaDROP EGG
Dropped.
>SAVE
Load SAVE disk then enter file name.
(default file name is ZORK1.).
Type <ENTER> to continue > 2NDGO.SAV
Load Game Disk if it was removed.
Type <ENTER> to continue >
Ok.
>N
The Troll Room
This is a small room with passages to the east and south and a
forbidding hole leading west. Bloodstains andATTACK TROLL
(with the sword)
A quick stroke, but the troll is on guard.
The troll swings; the blade turns on your armor but crashes
broadATTACK TROLL
(with the sword)
You are still recovering from that last blow, so your attack
is ineffective.
The troll swings his axe, but i
>ATTACK TROLL
(with the sword)
The haft of your sword knocks out the troll.
>ATTACK TROLL
(with the sword)
The unarmed troll cannot defend himself: He dies.
Almost as soon as the troll breathes his last breath, a cloud
of sinister blDIAGNOSTIC
You are in perfect health.
You can be killed by a serious wound.
>SAVE
Load SAVE disk then enter file name.
(default file name is 2NDGO.SAV).
Type <ENTER> to continue >
Load Game Disk if it was removed.
Type <ENTER> to continue >
Ok.
>W
Maze
This is part of a maze of twisty little passages, all alike.
A "lean and hungry" gentleman just wandered through, carrying
a large bag. Finding nothing of value, he left disgruntled.
>W
Maze
This is part of a maze of twisty little passages, all alike.
>U
You can't go that way.
>W
Maze
This is part of a maze of twisty little passages, all alike.
>U
Maze
This is part of a maze of twisty little passages, all alike. A
skeleton, probably the remains of a luckless adventurer,
>GET COINS
Taken.
>GET KEY
Taken.
>SW
Maze
This is part of a maze of twisty little passages, all alike.
>E
Maze
This is part of a maze of twisty little passages, all alike.
>S
Maze
This is part of a maze of twisty little passages, all alike.
Your sword is glowing with a faint blue glow.
>SE
Cyclops Room
This room has an exit on the northwest, and a staircase
leading up.
A cyclops, who looks prepared to eat horses (much less merI
You are carrying:
A skeleton key
A leather bag of coins
A brass lantern (providing light)
A sword
A glass bottlOPEN SACK
It is already open.
>TAKE LUNCH
Taken.
>GIVE LUNH� �CH TO Y\CYCLOPS
I don't know the word "y\cyclops".
>GIVE LUNCH TO CYCLOPS
The cyclops says "Mmm Mmm. I love hot peppers! But oh, could I
use a drink. Perhaps I could drink the blood of that thing."
FOPEN BOTTLE
Opened.
The cyclops is moving about the room, looking for something.
>GIVE WATER TO CYCLOPS
The cyclops takes the bottle, checks that it's open, and
drinks the water. A moment later, he lets out a yawn that
nearly blI
You are carrying:
A skeleton key
A leather bag of coins
A brass lantern (providing light)
A sword
A brown sack
NW
Maze
This is part of a maze of twisty little passages, all alike.
Your sword is glowing with a faint blue glow.
>S
Maze
This is part of a maze of twisty little passages, all alike.
Your sword is no longer glowing.
>W
Maze
This is part of a maze of twisty little passages, all alike.
>U
Maze
This is part of a maze of twisty little passages, all alike.
>W
Maze
This is part of a maze of twisty little passages, all alike.
>SW
Maze
This is part of a maze of twisty little passages, all alike.
>NE
Grating Room
You are in a small room near the maze. There are twisty
passages in the immediate vicinity.
Above you is a gra
>UNLOCK GRATING
(with the skeleton key)
The grate is unlocked.
>OPEN GRATING
The grating opens to reveal trees above you.
A pile of leaves falls onto your head and to the ground.
>UP
Clearing
You are in a clearing, with a forest surrounding you on all
sides. A path leads south.
There is an open grating, dW
Forest
This is a forest, with trees in all directions. To the east,
there appears to be sunlight.
You hear in the distanceW
You would need a machete to go further west.
>LOOK
Forest
This is a forest, with trees in all directions. To the east,
there appears to be sunlight.
>E
Forest Path
You hear in the distance the chirping of a song bird.
>LOOK
Forest Path
This is a path winding through a dimly lit forest. The path
heads north-south here. One particularly large tree E
Forest
>W
Forest Path
>S
North of House
>E
Behind House
>ENTER WINDOW
Kitchen
>W
Living Room
>OPEN TROPHY � �CASE
It is already open.
>PUT COINS IN TROPHY CASE
Done.
>DROP KEY
Dropped.
>DROP BOTTLE
You don't have that!
>I
You are carrying:
A brass lantern (providing light)
A sword
A brown sack
A leaflet
>OPEN TRAPDOOR
The door reluctantly opens to reveal a rickety staircase
descending into darkness.
>D
Cellar
There is a jewel-encrusted egg here.
>S
East of Chasm
You are on the east edge of a chasm, the bottom of which
cannot be seen. A narrow passage goes north, and theE
Gallery
This is an art gallery. Most of the paintings have been stolen
by vandals with exceptional taste. The vandals left tGET PAINTING
Taken.
>W
East of Chasm
>N
Cellar
There is a jewel-encrusted egg here.
>U
Living Room
There is a skeleton key here.
Your collection of treasures consists of:
A leather bag of coins
>PUT PAINTING IN TROPHY CASE
Done.
>D
Cellar
There is a jewel-encrusted egg here.
>N
The Troll Room
There is a bloody axe here.
>E
East-West Passage
This is a narrow east-west passageway. There is a narrow
stairway leading down at the north end of the rooE
Round Room
This is a circular stone room with passages in all directions.
Several of them have unfortunately been blocked byE
Loud Room
This is a large room with a ceiling which cannot be detected
from the ground. There is a narrow passage from east GET BAR
bar bar ...
>LOOK
look look ...
>GET BAR BAR BLACKSHEEP
blacksheep blacksheep ...
>BAR BAR BARBRANNE!
barbranne! barbranne! ...
>ECHO
The acoustics of the room change subtly.
Loud Room
On the ground is a large platinum bar.
>GET PLATINUM BAR
Taken.
>W
Round Room
>W
East-West Passage
>W
The Troll Room
There is a bloody axe here.
>S
Cellar
There is a jewel-encrusted egg here.
>U
Living Room
There is a skeleton key here.
Your collection of treasures consists of:
A painting
A leather bag of coins
>PUT PLATINUM BAR IN TROPHY CASE
Done.
>LOOK
Living Room
You are in the living room. There is a doorway to the east, a
wooden door with strange gothic lettering to the wD
Cellar
There is a jewel-encrusted egg here.
>N
The Troll Room
There is a bloody axe here.
>E
East-West Passage
>E
Round Room
>E
Loud Room
>N
You can't go that way.
>U
Deep Canyon
You are on the south edge of a deep canyon. Passages lead off
to the east, northwest and southwest. A stairway l
>E
Dam
You are standing on the top of the Flood Control Dam #3, which
was quite a tourist attraction in times far distant. TherN
Dam Lobby
This room appears to have been the waiting room for groups
touring the dam. There are open doorways here to the noGET B� �\� �MATCHBOOK
Taken.
>READ MATCHBOOK
(Close cover before striking)
YOU too can make BIG MONEY in the exciting field of PAPER
SHUFFLING!
Mr. Anderson of MuddREAD MATCHBOOK
(Close cover before striking)
YOU too can make BIG MONEY in the exciting field of PAPER
SHUFFLING!
Mr. Anderson of M
I beg your pardon?
>READ MATCHBOOK
(Close cover before striking)
YOU too can make BIG MONEY in the exciting field of PAPER
SHUFFLING!
Mr. Anderson of Mupromising future and make really big Zorkmids."
GUE Tech can't promise these fantastic results to everyone.
But when you earN
Maintenance Room
This is what appears to have been the maintenance room for
Flood Control Dam #3. Apparently, this room hasPUSH YELLOW BUTTON
Click.
>GET WRENCH
Taken.
>S
Dam Lobby
Some guidebooks entitled "Flood Control Dam #3" are on the
reception desk.
>S
Dam
You are standing on the top of the Flood Control Dam #3, which
was quite a tourist attraction in times far distant. TherTURN BOLT
(with the wrench)
The sluice gates open and water pours through the dam.
>DROP WRENCH
Dropped.
>W
Reservoir South
You are in a long room. To the north is a large lake, too deep
to cross. You notice, however, that the water lLOOK
Reservoir South
You are in a long room. To the north is a large lake, too deep
to cross. You notice, however, that the watsouthwest along the edge of a chasm, and a
path leading into a canyon to the southeast.
>WAIT
Time passes...
>LOOK
Reservoir South
You are in a long room. To the north is a large lake, too deep
to cross. You notice, however, that the wat
>WAIT
Time passes...
>LOOK
Reservoir South
You are in a long room. To the north is a large lake, too deep
to cross. You notice, however, that the wateThe water level is now quite low here and you could easily
cross over to the other side.
>WAIT
Time passes...
>LOOK
Reservoir South
You are in a long room, to the north of which was formerly a
lake. However, with the water level lowered, thWAIT
Time passes...
>LOOK
Reservoir South
You are in a long room, to the north of which was formerly a
lake. However, with the water level lowered, t
>SAVE
Load SAVE disk then enter file name.
(default file name is 2NDGO.SAV).
Type <ENTER> to continue >
Load Game Disk if it was removed.
Type <ENTER> to continue >
Ok.
>LOOK
Reservoir South
You are in a long room, to the north of which was formerly a
lake. However, with the water level lowered, thSA\� �� �TATUS
I don't know the word "status".
>SCORE
Your score is 85 (total of 350 points), in 131 moves.
This gives you the rank of Novice Adventurer.
>LOOK
Reservoir South
You are in a long room, to the north of which was formerly a
lake. However, with the water level loweredWAIT
Time passes...
>LOOK
Reservoir South
You are in a long room, to the north of which was formerly a
lake. However, with the water level lowered, tLOOK
Reservoir South
You are in a long room, to the north of which was formerly a
lake. However, with the water level loweredWAIT
Time passes...
>LOOK
Reservoir South
You are in a long room, to the north of which was formerly a
lake. However, witN
Reservoir
You are on what used to be a large lake, but which is now a
large mud pile. There are "shores" to the north and sGET TRUNK
Taken.
>I
You are carrying:
A trunk of jewels
A matchbook
A brass lantern (providing light)
A sword
A brown sack
A leaS
Reservoir South
>SW
Chasm
A chasm runs southwest to northeast and the path follows it.
You are on the south side of the chasm, where a crack opeSW
East-West Passage
>W
The Troll Room
There is a bloody axe here.
>S
Cellar
>U
Living Room
There is a skeleton key here.
Your collection of treasures consists of:
A platinum bar
A painting
PUT JEWELS IN TROPHY CABINET
I don't know the word "cabinet".
>PUT JEWELS IN TROPHY CASE
Done.
>SCORE
Your score is 105 (total of 350 points), in 148 moves.
This gives you the rank of Junior Adventurer.
>SAVE
Load SAVE disk then enter file name.
(default file name is 2NDGO.SAV).
Type <ENTER> to continue >
Load Game Disk if it was removed.
Type <ENTER> to continue >
Ok.
>D
Cellar
>N
The Troll Room
There is a bloody axe here.
>E
East-West Passage
>N
Chasm
>NE
Reservoir South
>N
Reservoir
>N
Reservoir North
You are in a large cavernous room, the south of which was
formerly a lake. However, with the water level lowerGET AIR PUMP
That sentence isn't one I recognize.
>GET PUMP
Taken.
>N
Atlantis Room
This is an ancient room, long under water. There is an exit to
the south and a staircase leading up.
On the sGET GET\� �� �� �� �TRIDENT
Taken.
>U
Cave
This is a tiny cave with entrances west and north, and a
staircase leading down.
>N
Mirror Room
You are in a large square room with tall ceilings. On the
south wall is an enormous mirror which fills the enti
>LOOK IN MIRROR
There is an ugly person staring back at you.
>N
Cold Passage
This is a cold and damp corridor where a long east-west
passageway turns into a southward path.
>W
Slide Room
This is a small chamber, which appears to have been part of a
coal mine. On the south wall of the chamber the let
>D
Cellar
>U
Living Room
There is a skeleton key here.
Your collection of treasures consists of:
A trunk of jewels
A platinum bPUT TRIDENT IN TROPHY CASE
Done.
>SCORE
Your score is 120 (total of 350 points), in 166 moves.
This gives you the rank of Junior Adventurer.
>SAVE
Load SAVE disk then enter file name.
(default file name is 2NDGO.SAV).
Type <ENTER> to continue >
Load Game Disk if it was removed.
Type <ENTER> to continue >
Ok.
>E
Kitchen
>U
Attic
This is the attic. The only exit is a stairway leading down.
A large coil of rope is lying in the corner.
On a table isGET ROPE
Taken.
>D
Kitchen
>W
Living Room
There is a skeleton key here.
Your collection of treasures consists of:
A crystal trident
D
Cellar
>N
The Troll Room
There is a bloody axe here.
>E
East-West Passage
>E
Round Room
>SE
Engravings Cave
You have entered a low cave with passages leading northwest
and east.
There are old engravings on the walls
>E� �LOOK AT ENGRAVINGS
The engravings were incised in the living rock of the cave
wall by an unknown hand. They depict, in symbolic form, the
beli
>E
Dome Room
You are at the periphery of a large dome, which forms the
ceiling of another room below. Protecting you from a
precipitous drop is a wooden railing which circles the dome.
>TIE ROPE TO T� �RAILING
The rope drops over the side and comes within ten feet of the
floor.
>D
Torch Room
This is a large room with a prominent doorway leading to a
down staircase. Above you is a large dome. Up around Sitting on the pedestal is a flaming torch, made of ivory.
>GET FLAMING TORCH
Taken.
>TURN OFF LAMP
The brass lantern is now off.
>LOOK
Torch Room
This is a large room with a prominent doorway leading to a
down staircase. Above you is a large dome. Up around t
>S
Temple
This is the north end of a large temple. On the east wall is
an ancient inscription, probably a prayer in a long-forThere is a brass bell here.
>I
You are carrying:
A torch (providing light)
A hand-held air pump
A matchbook
A brass lantern
A sword
A browDROP PUMP
Dropped.
>DROP MATCHBOOK
Dropped.
>DROP LANTERN
Dropped.
>FROP
I don't know the word "frop".
>DROP SWORD
Dropped.
>DROP SACK
Dropped.
>DROO� �P LEAFLET
Dropped.
>LOOK
Temple
This is the north end of a large temple. On the east wall is
an ancient inscription, probably a prayer in a long-for
>I
You are carrying:
A torch (providing light)
>SAVE
Load SAVE disk then enter file name.
(default file name is 2NDGO.SAV).
Type <ENTER> to continue >
Load Game Disk if it was removed.
Type <ENTER> to continue >
Ok.
>E
Egyptian Room
This is a room which looks like an Egyptian tomb. There is an
ascending staircase to the west.
The solid-goldLOOK AT COFFIN
The gold coffin is closed.
>OPEN COFFIN
The gold coffin opens.
A sceptre, possibly that of ancient Egypt itself, is in the
coffin. The sceptre is ornamented with coloTAKE SCEPTRE
Taken.
>W
Temple
A small leaflet is on the ground.
There is a brown sack here.
There is a sword here.
There is a brass lantern (battS
Altar
This is the south end of a large temple. In front of you is
what appears to be an altar. In one corner is a small holePRAY
Forest
>E
Forest Path
>S
North of House
>E
Behind House
>ENTER WINDOW
Kitchen
>W
Living Room
There is a skeleton key here.
Your collection of treasures consists of:
A crystal trident
A trunk of jPUT SCEPTE\RE IN TROPHY CASE
Done.
>SCORE
Your score is 144 (total of 350 points), in 206 moves.
This gives you the rank of Junior Adventurer.
>SAVE
Load SAVE disk then enter file name.
(default file name is 2NDGO.SAV).
Type <ENTER> to continue >
Load Game Disk if it was removed.
Type <ENTER> to continue >
Ok.
>D
Cellar
>N
The Troll Room
There is a bloody axe here.
>E
East-West Passage
>E
Round Room
>SW� �E
Engravings Cave
There are old engravings on the walls here.
>E
Dome Room
>D
Torch Room
>S
Temple
A small leaflet is on the ground.
There is a brown sack here.
There is a sword here.
There is a brass lantern (battGET MATCHN� �BOOK
Taken.
>GET BELL
Taken.
>OPEN MATCHBOOK
You have 5 matches.
>S
Altar
On the two ends of the altar are burning candles.
On the altar is a large black book, open to page 569.
>GET CANDLES
Taken.
>GET BOOK
Taken.
>I
You are carrying:
A black book
A pair of candles (providing light)
A brass bell
A matchbook
A torch (providing TURN OFF CABL\� �� �� �NDE� �LES
The flame is extinguished.
>D
Cave
This is a tiny cave with entrances west and north, and a dark,
forbidding staircase leading down.
Someone carrying a larD
Entrance to Hades
You are outside a large gateway, on which is inscribed
Abandon every hope all ye who enter here!
Th
>RING BELL
The bell suddenly becomes red hot and falls to the ground. The
wraiths, as if paralyzed, stop their jeering and slowly turn
expression of a
long-forgotten terror takes shape.
In your confusion, the candles drop to the ground (and they
are out).
>GET CANDLES
Taken.
>LIGHT MATCH
One of the matches starts to burn.
>LIGHT CANN� �DLE
(with the match)
The candles are lit.
The flames flicker wildly and appear to dance. The earth
beneath your feet trembles, I
You are carrying:
A pair of candles (providing light)
A black book
A matchbook
A torch (providing light)
>LOOK AT BOOK
Commandment #12592
Oh ye who go about saying unto each: "Hello sailor":
Dost thou know the magnitude of thy sin before thTURN OFF CAB� �NDLES
The flame is extinguished.
>DROP BOOK
Dropped.
>LOOK
Entrance to Hades
You are outside a large gateway, on which is inscribed
Abandon every hope all ye who enter here!
ThSAVE
Load SAVE disk then enter file name.
(default file name is 2NDGO.SAV).
Type <ENTER> to continue >
Load Game Disk if it was removed.
Type <ENTER> to continue >
Ok.
>SCORE
Your score is 144 (total of 350 points), in 233 moves.
This gives you the rank of Junior Adventurer.
>EXIT
You can't go that way.
>QUIT
Your score is 144 (total of 350 points), in 234 moves.
This gives you the rank of Junior Adventurer.
Do you wish to leave tY
G>If you need to watch the YouTube stream, it can be found here https://youtu.be/K-Kv5saIHyE


