Like many small businesses, RC2014 started as a personal hobby project. When there was an interest in the PCBs it was easy enough to sell those out of a spare bedroom. As things started to take off in 2016 I set up a limited company, RFC2795 Ltd, to manage the financial side of things. Gradually RC2014 started to take over more of the house for stocking kits and components, building prototypes, and packing/shipping kits.

With space in the house getting more and more limited I looked in to the next step. Maybe renting an office? Rent a workshop? Move house? Buy a building for RC2014? In the end I settled on building a dedicated garden office. This allows me the home/work separation needed, whilst having minimal travel times. According to YouTube, it is something I should be able to build myself too, thus keeping costs to a minimum.

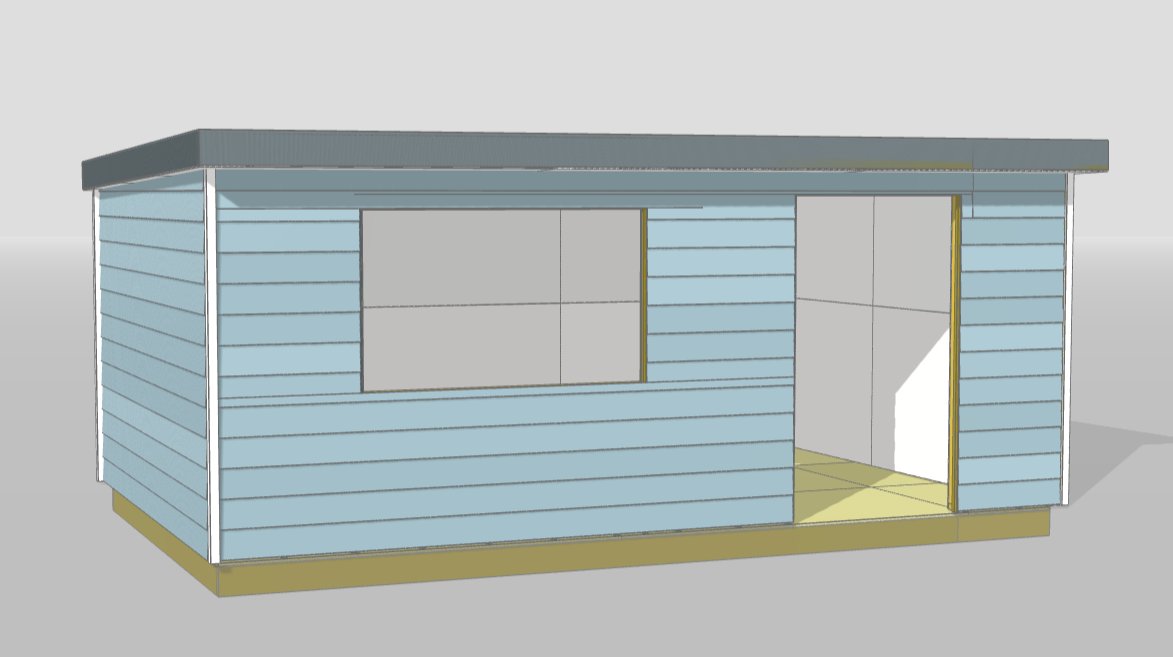
The design was a simple timber frame with flat pitched roof, large door, large window and probably clad with shiplap. The most important design aspect, however, was insulation. Lots of it. This needs to stay cool in the summer and be cheap to heat in the winter.

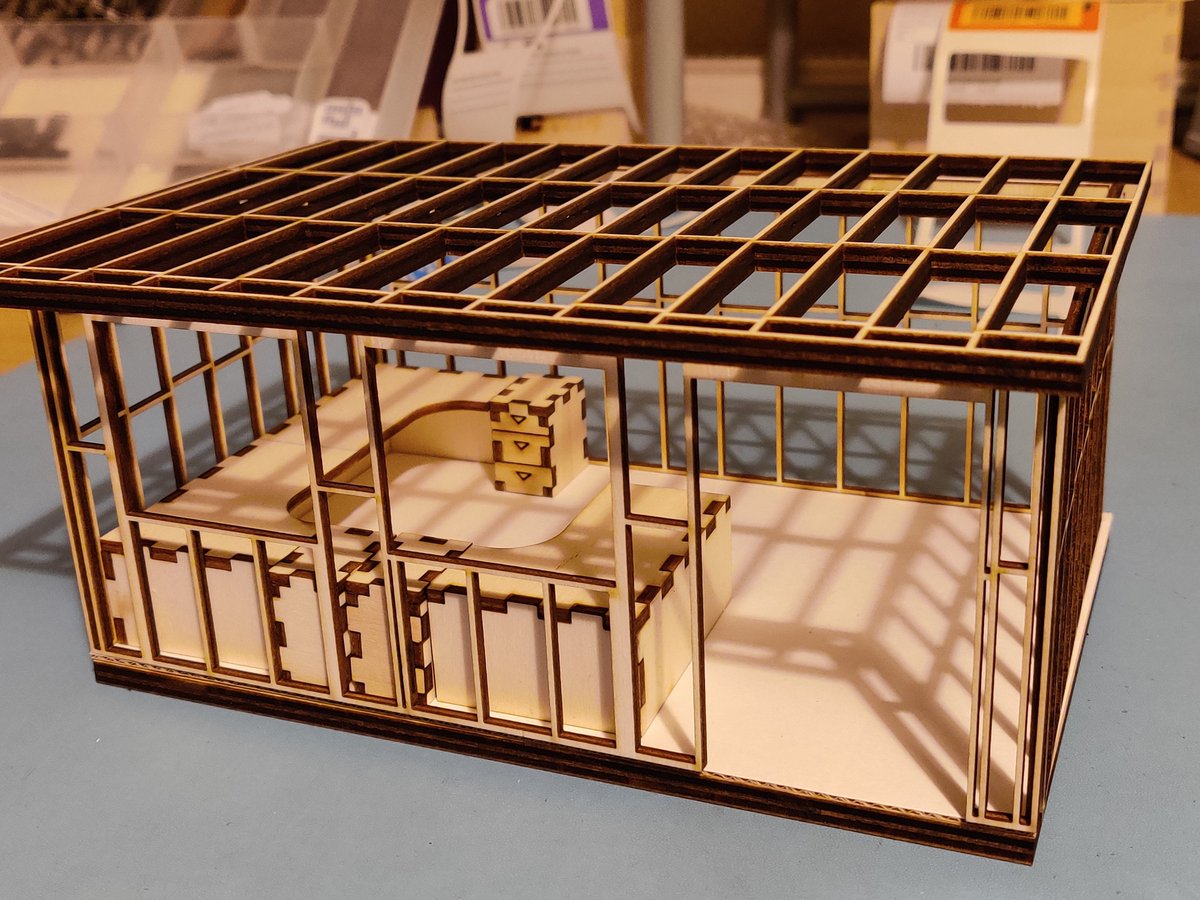
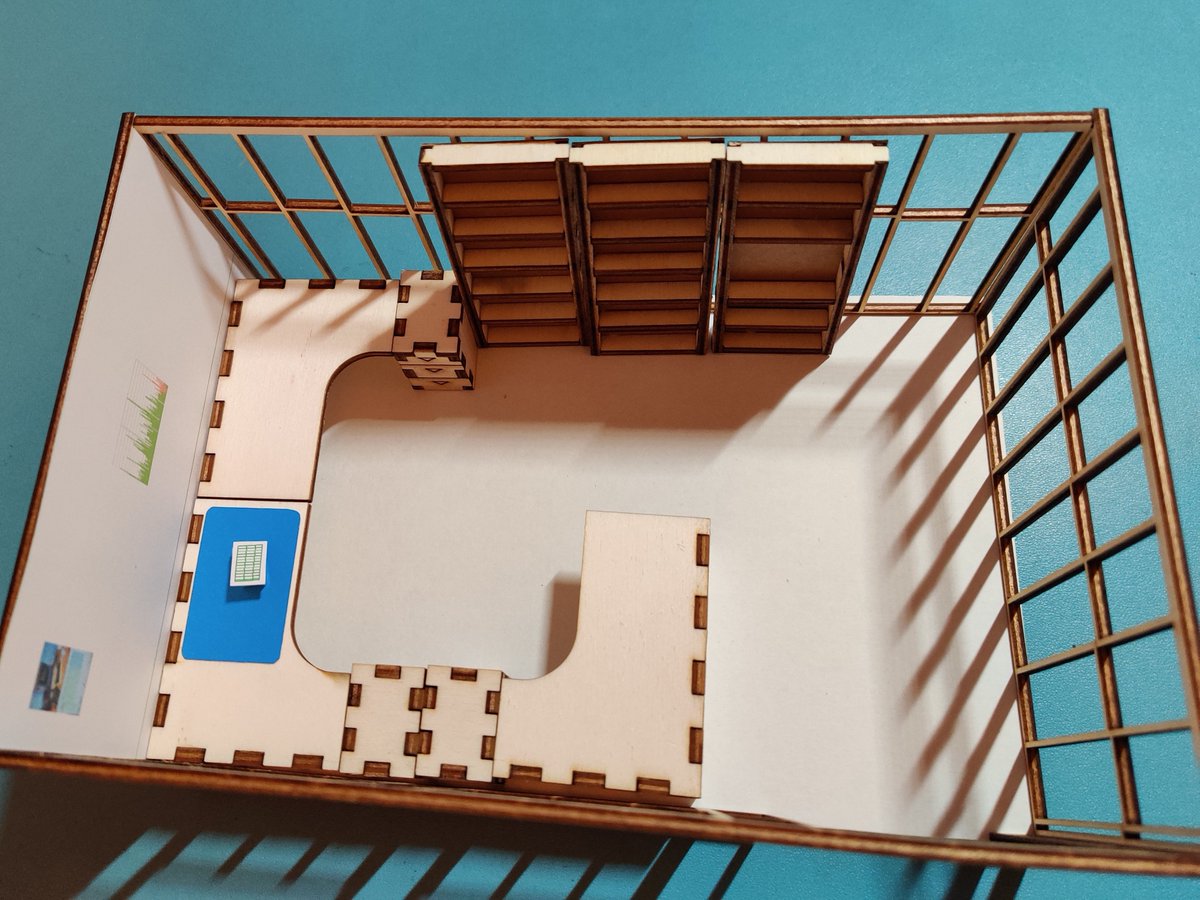
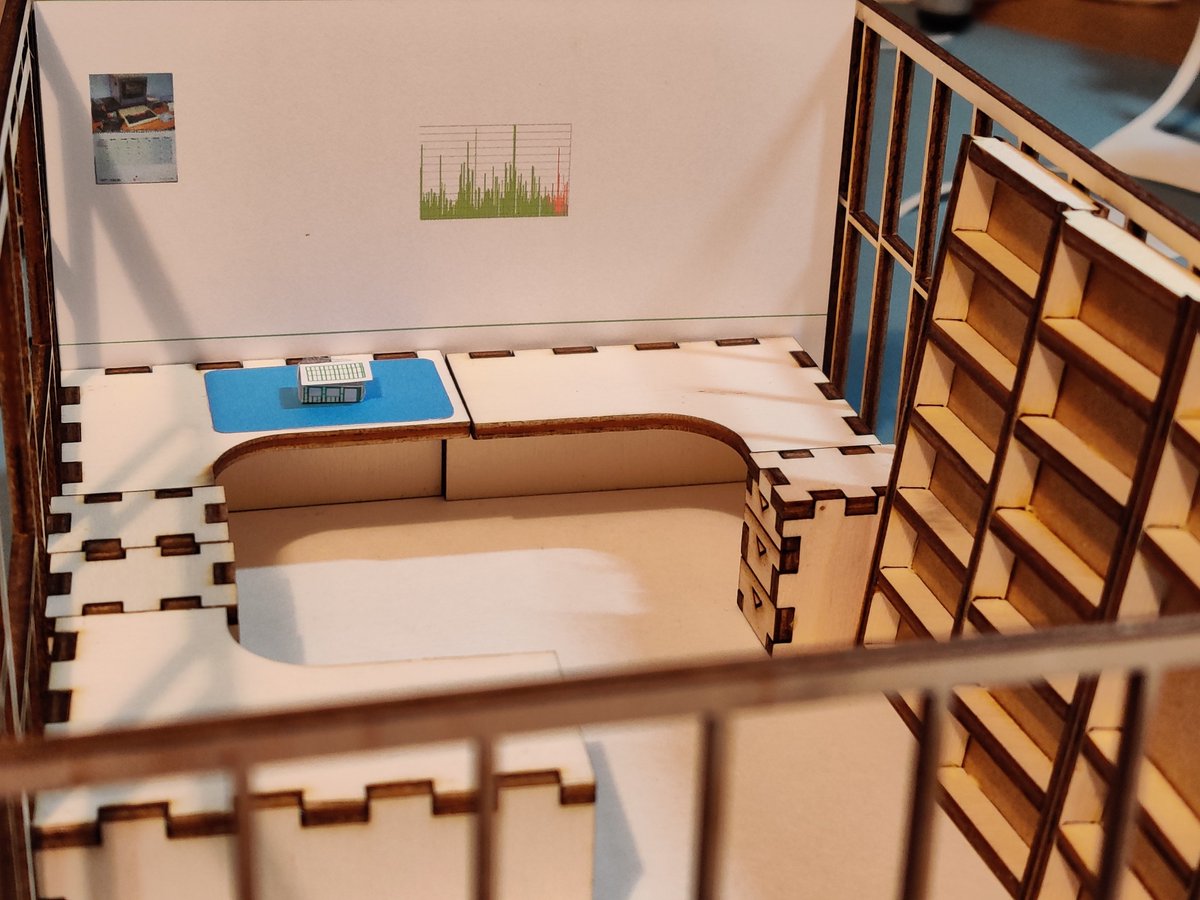
The bedroom that most of the RC2014 work is done in is 3.5m x 3.5. If the garden office was built 3.3m x 5.4m then it would be substantially larger, whilst being below the limit that would need planning application. To get a feel for the space, and see how things would work I laser cut a scale model and added scale furniture in it. Putting a scale model of the office on the desk in the scale model may have been a touch too much though!

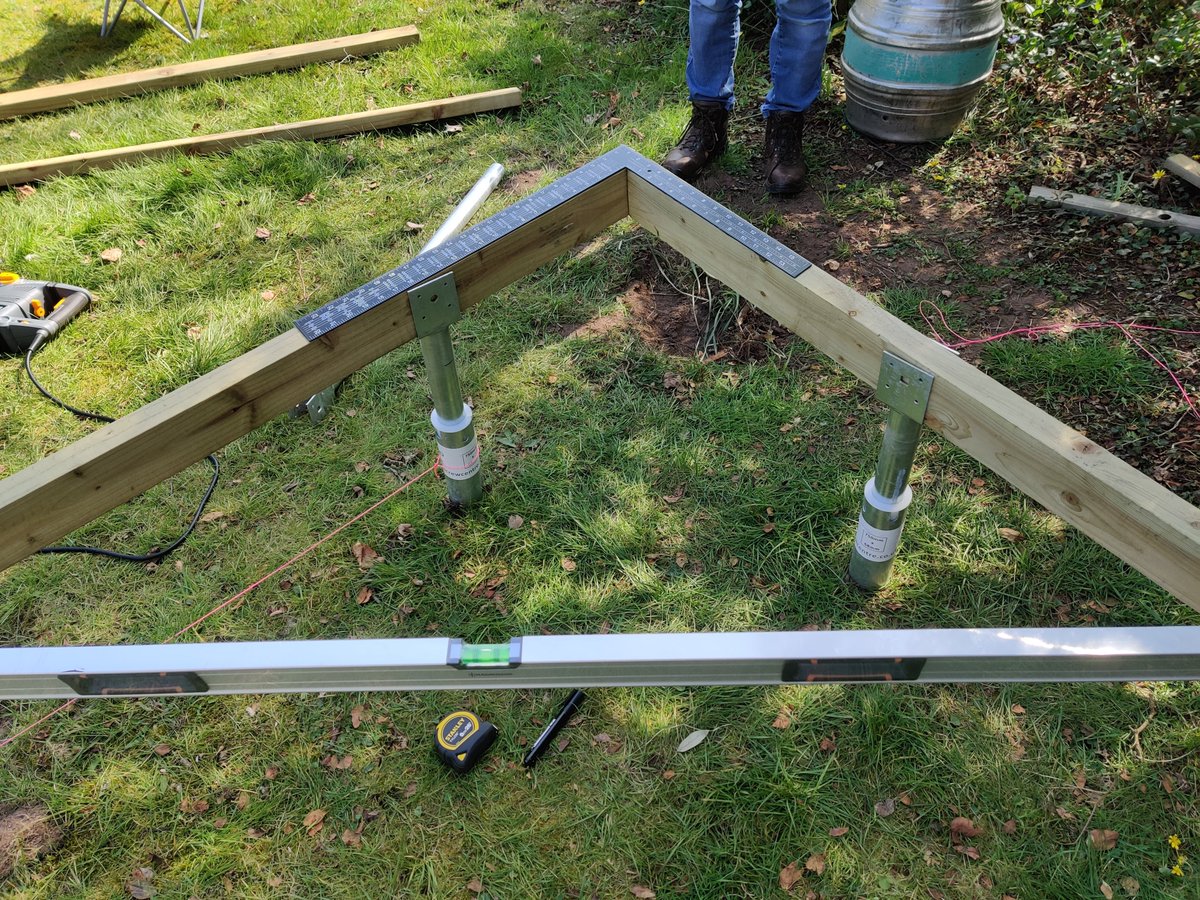
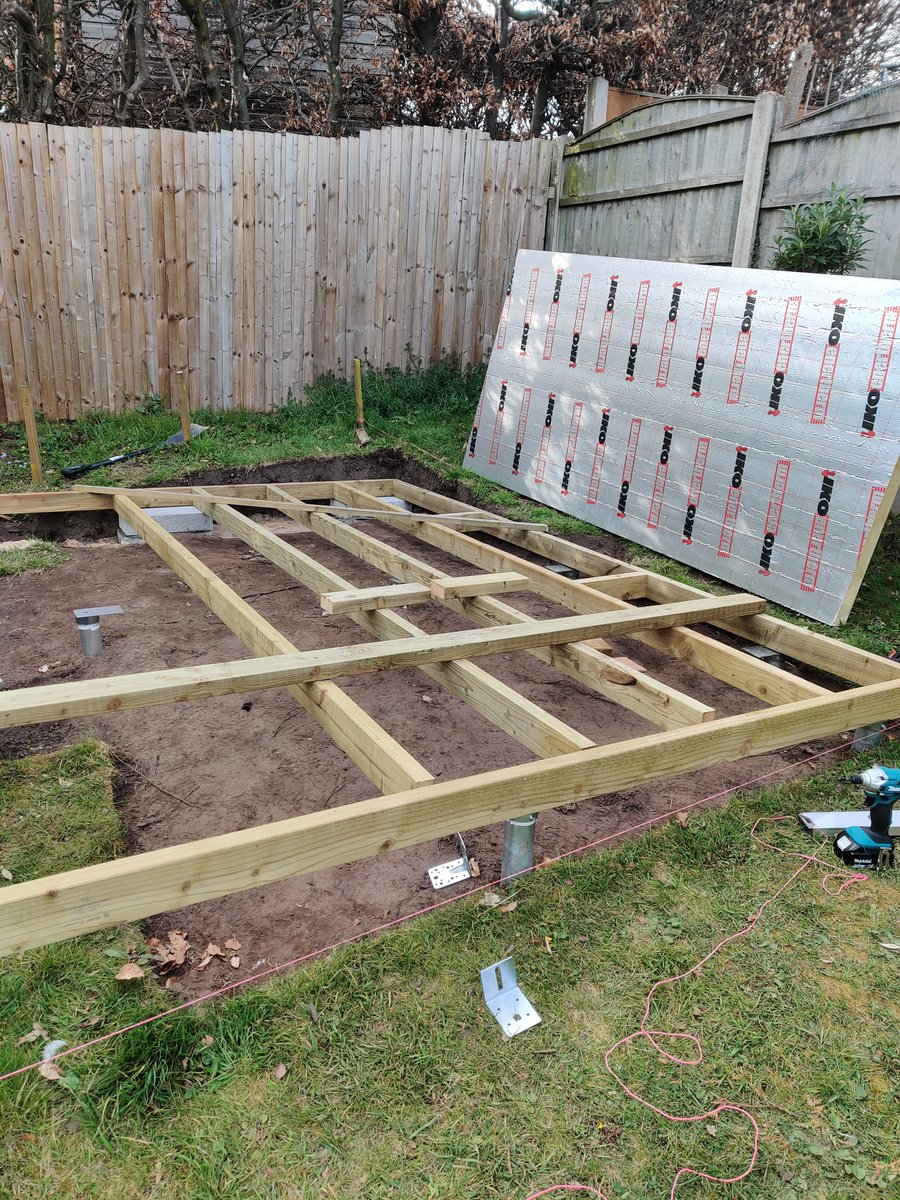
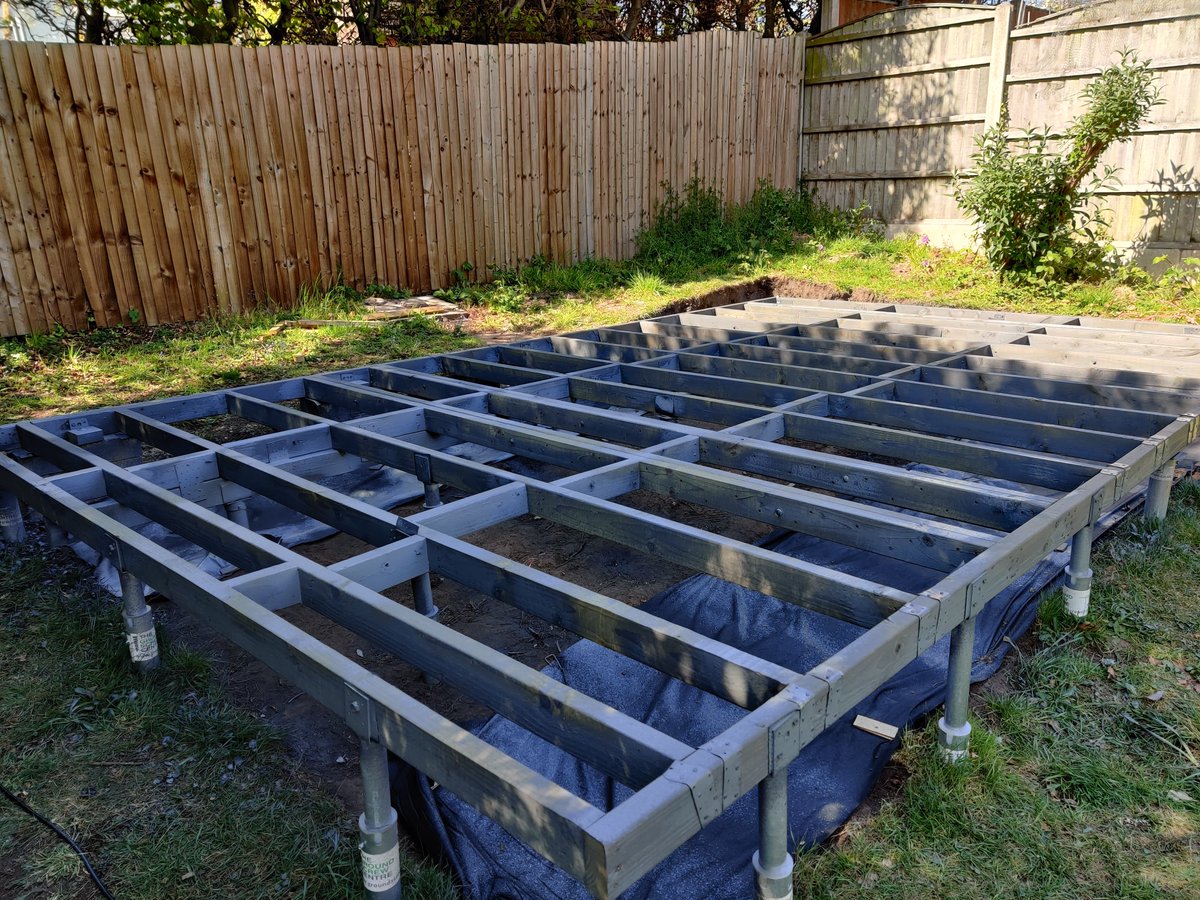
Work started in March 2022. Whilst I am lucky enough to have a garden with enough space for a garden office of this size, the garden is built on a hill which mostly slopes up from the house but also slopes right to left. This meant that in one corner the office would be over 0.5m above ground level, whilst in the opposite corner it would be about 0.4m below ground level. The subterranean corner was a lot of work to dig out, but worked in my favor because the limit on height for being exempt from building regulations is take from the adjacent ground level – thus giving me extra head height for a higher ceiling and more roof insulation. The timber frame was supported on ground screws which could be leveled out perfectly.

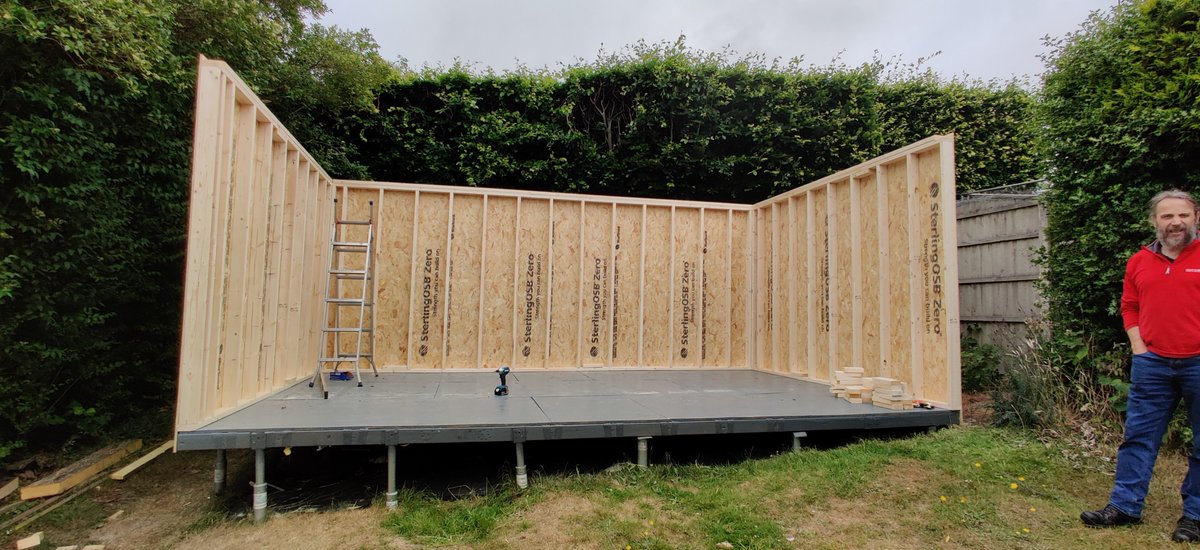
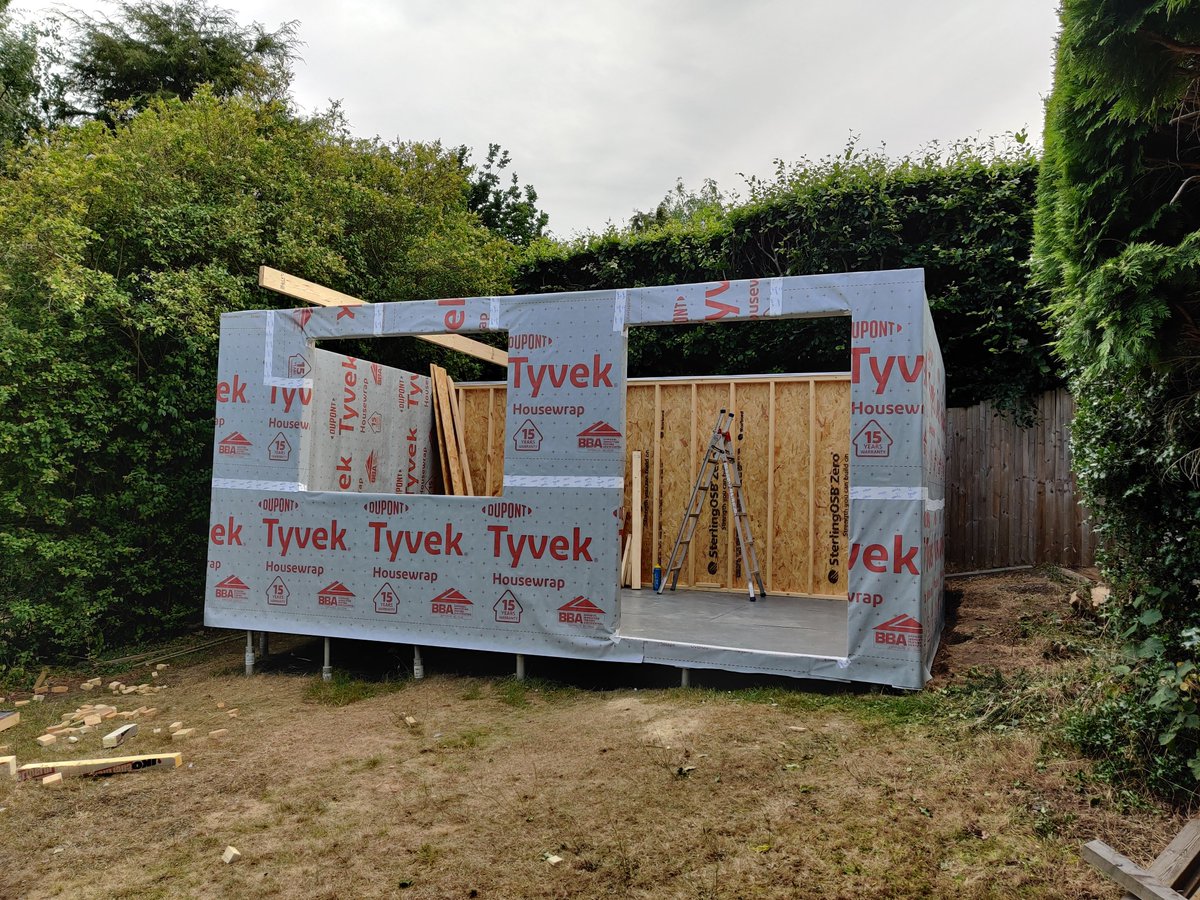
Over the very hot summer of 2022 the floor was installed and the walls erected. The elevation from road level meant great views, but carrying several tonnes of wood up to such a height was no small task. Whilst I carried out 99% of the work myself, the help of Shiela Dixon and Derek Woodruff was really appreciated.

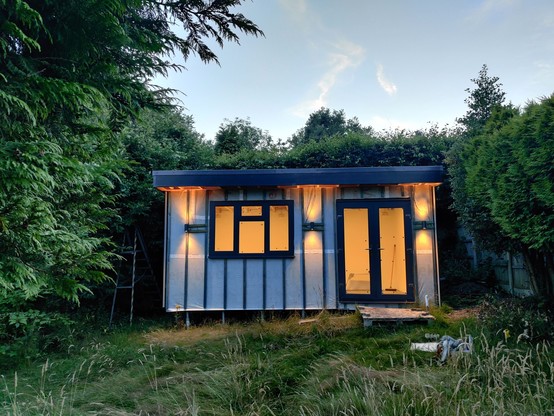
The goal for 2022 was to get to the stage of having a weatherproof box before winter. Thankfully this was achieved by the start of September.

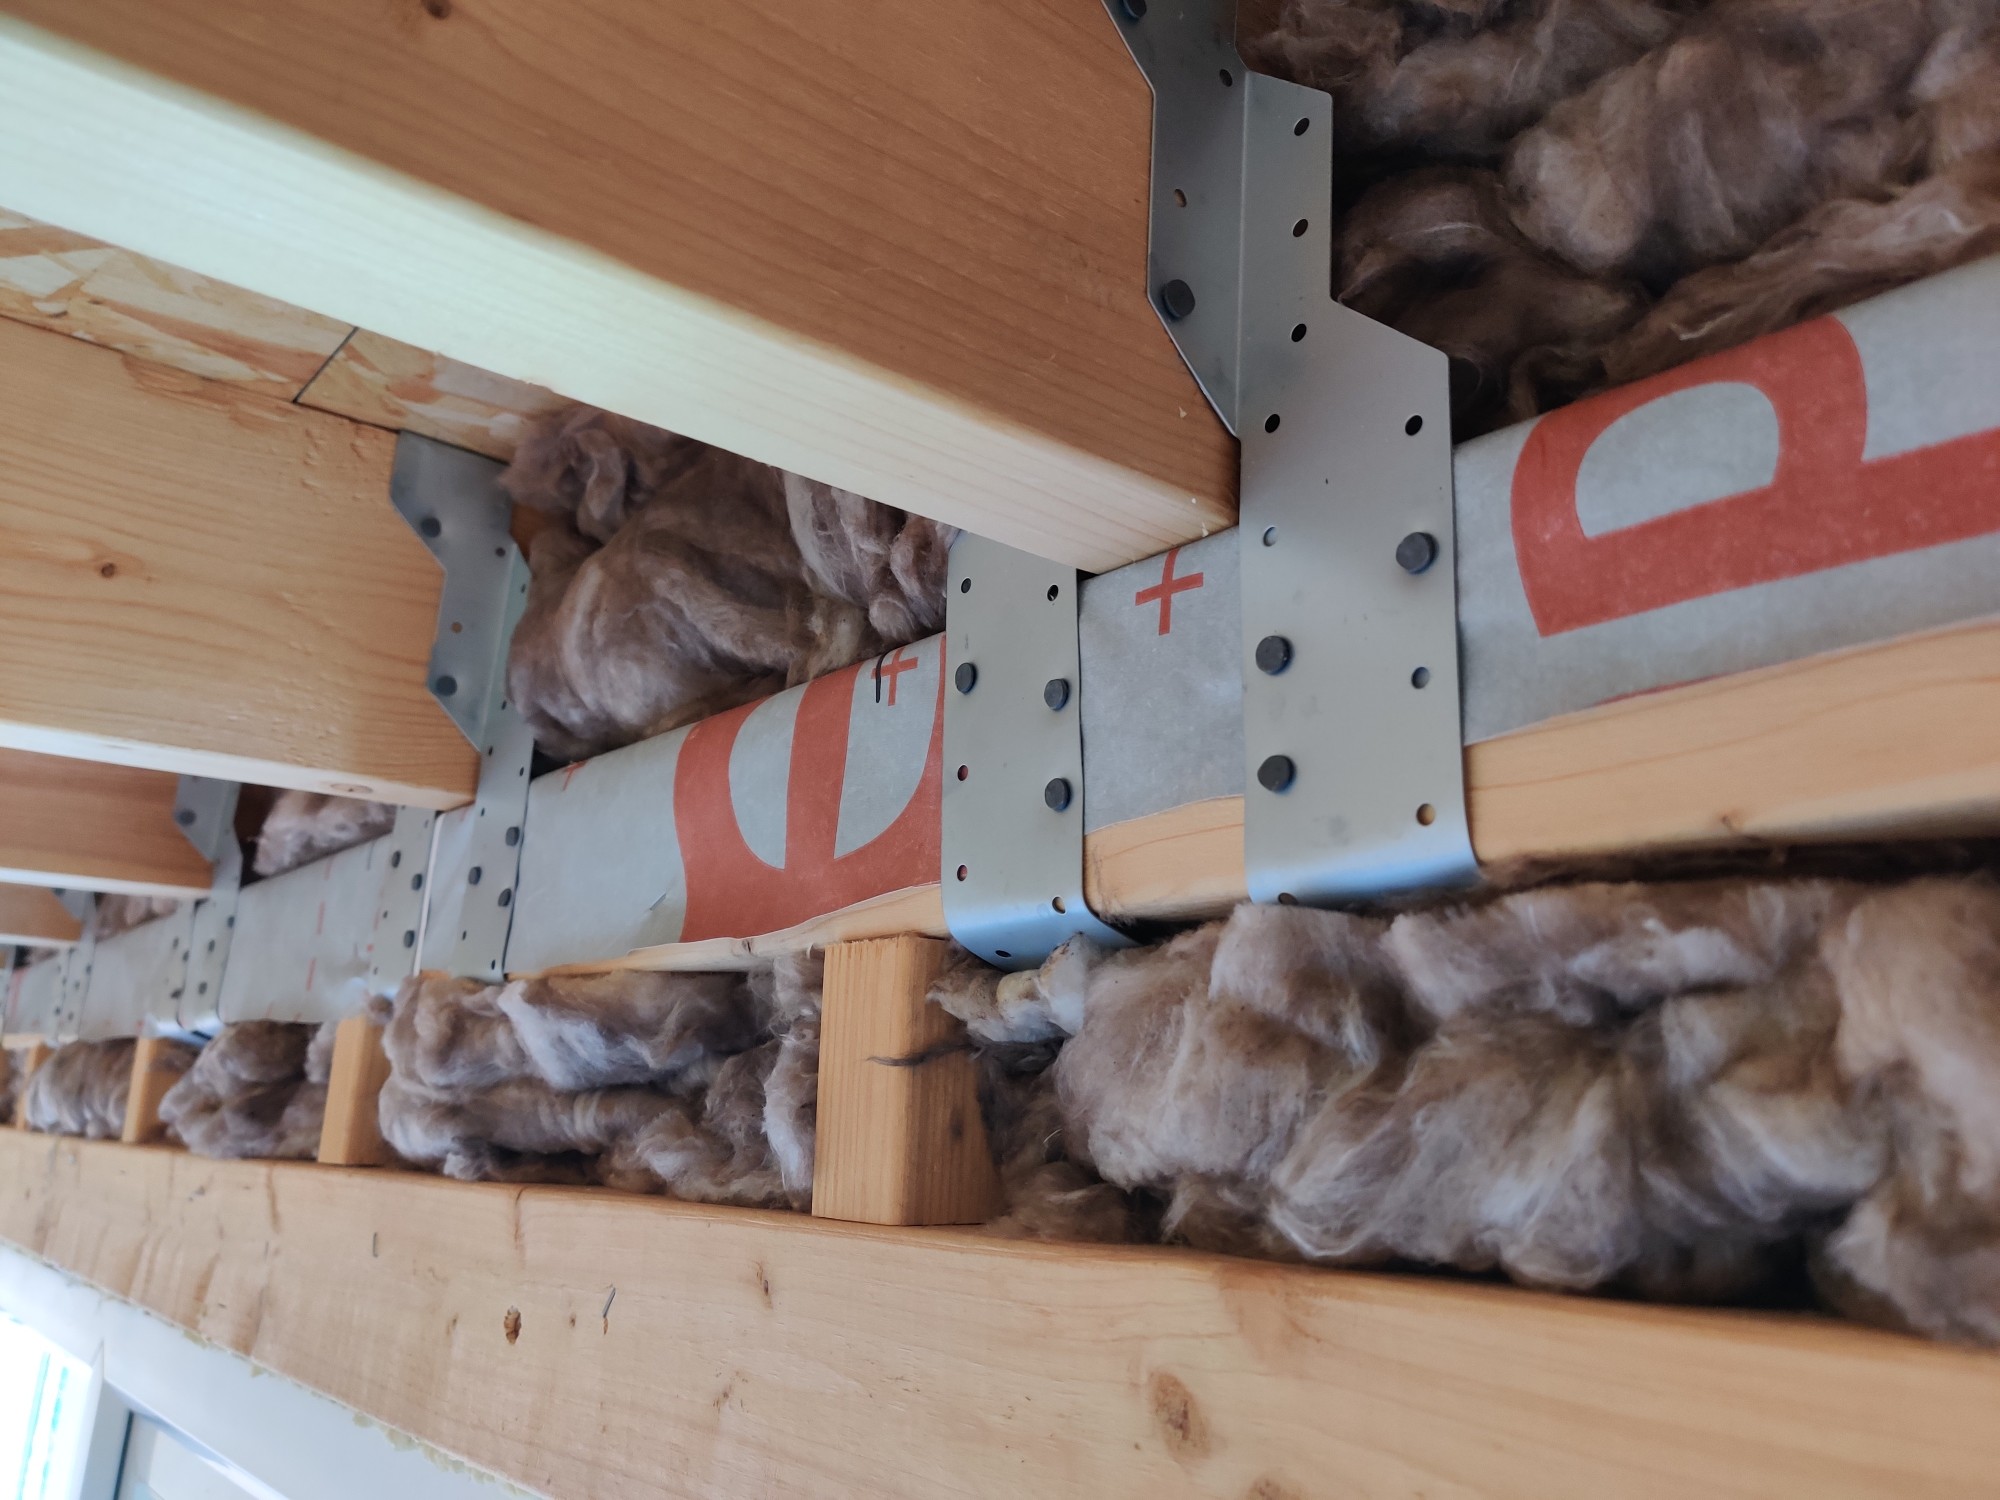
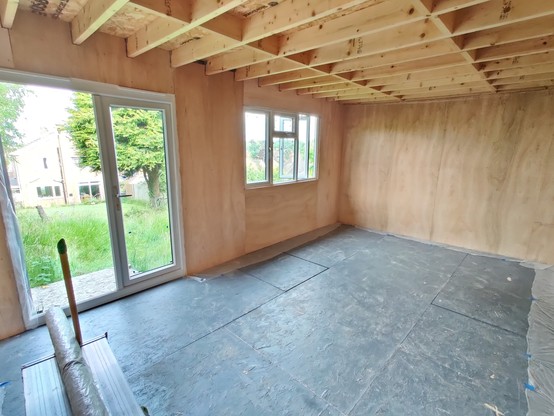
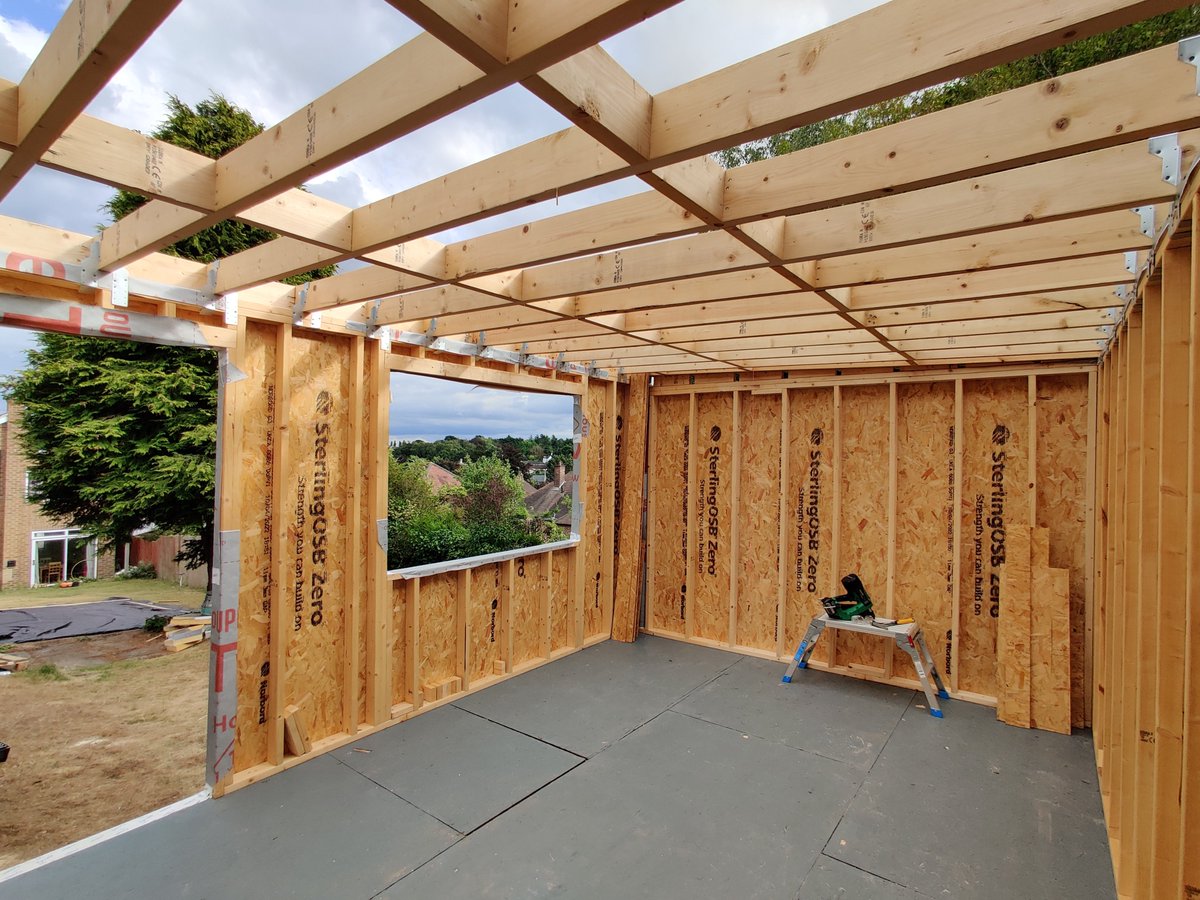
Not a lot of progress was made the following summer due mostly to a lack of time. 2024 however, saw a LOT of insulation going in before the walls were clad and painted internally.

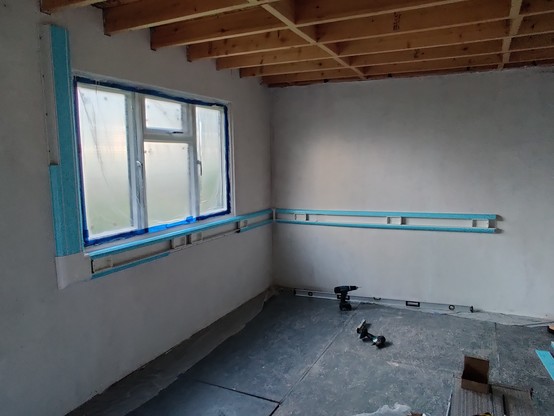
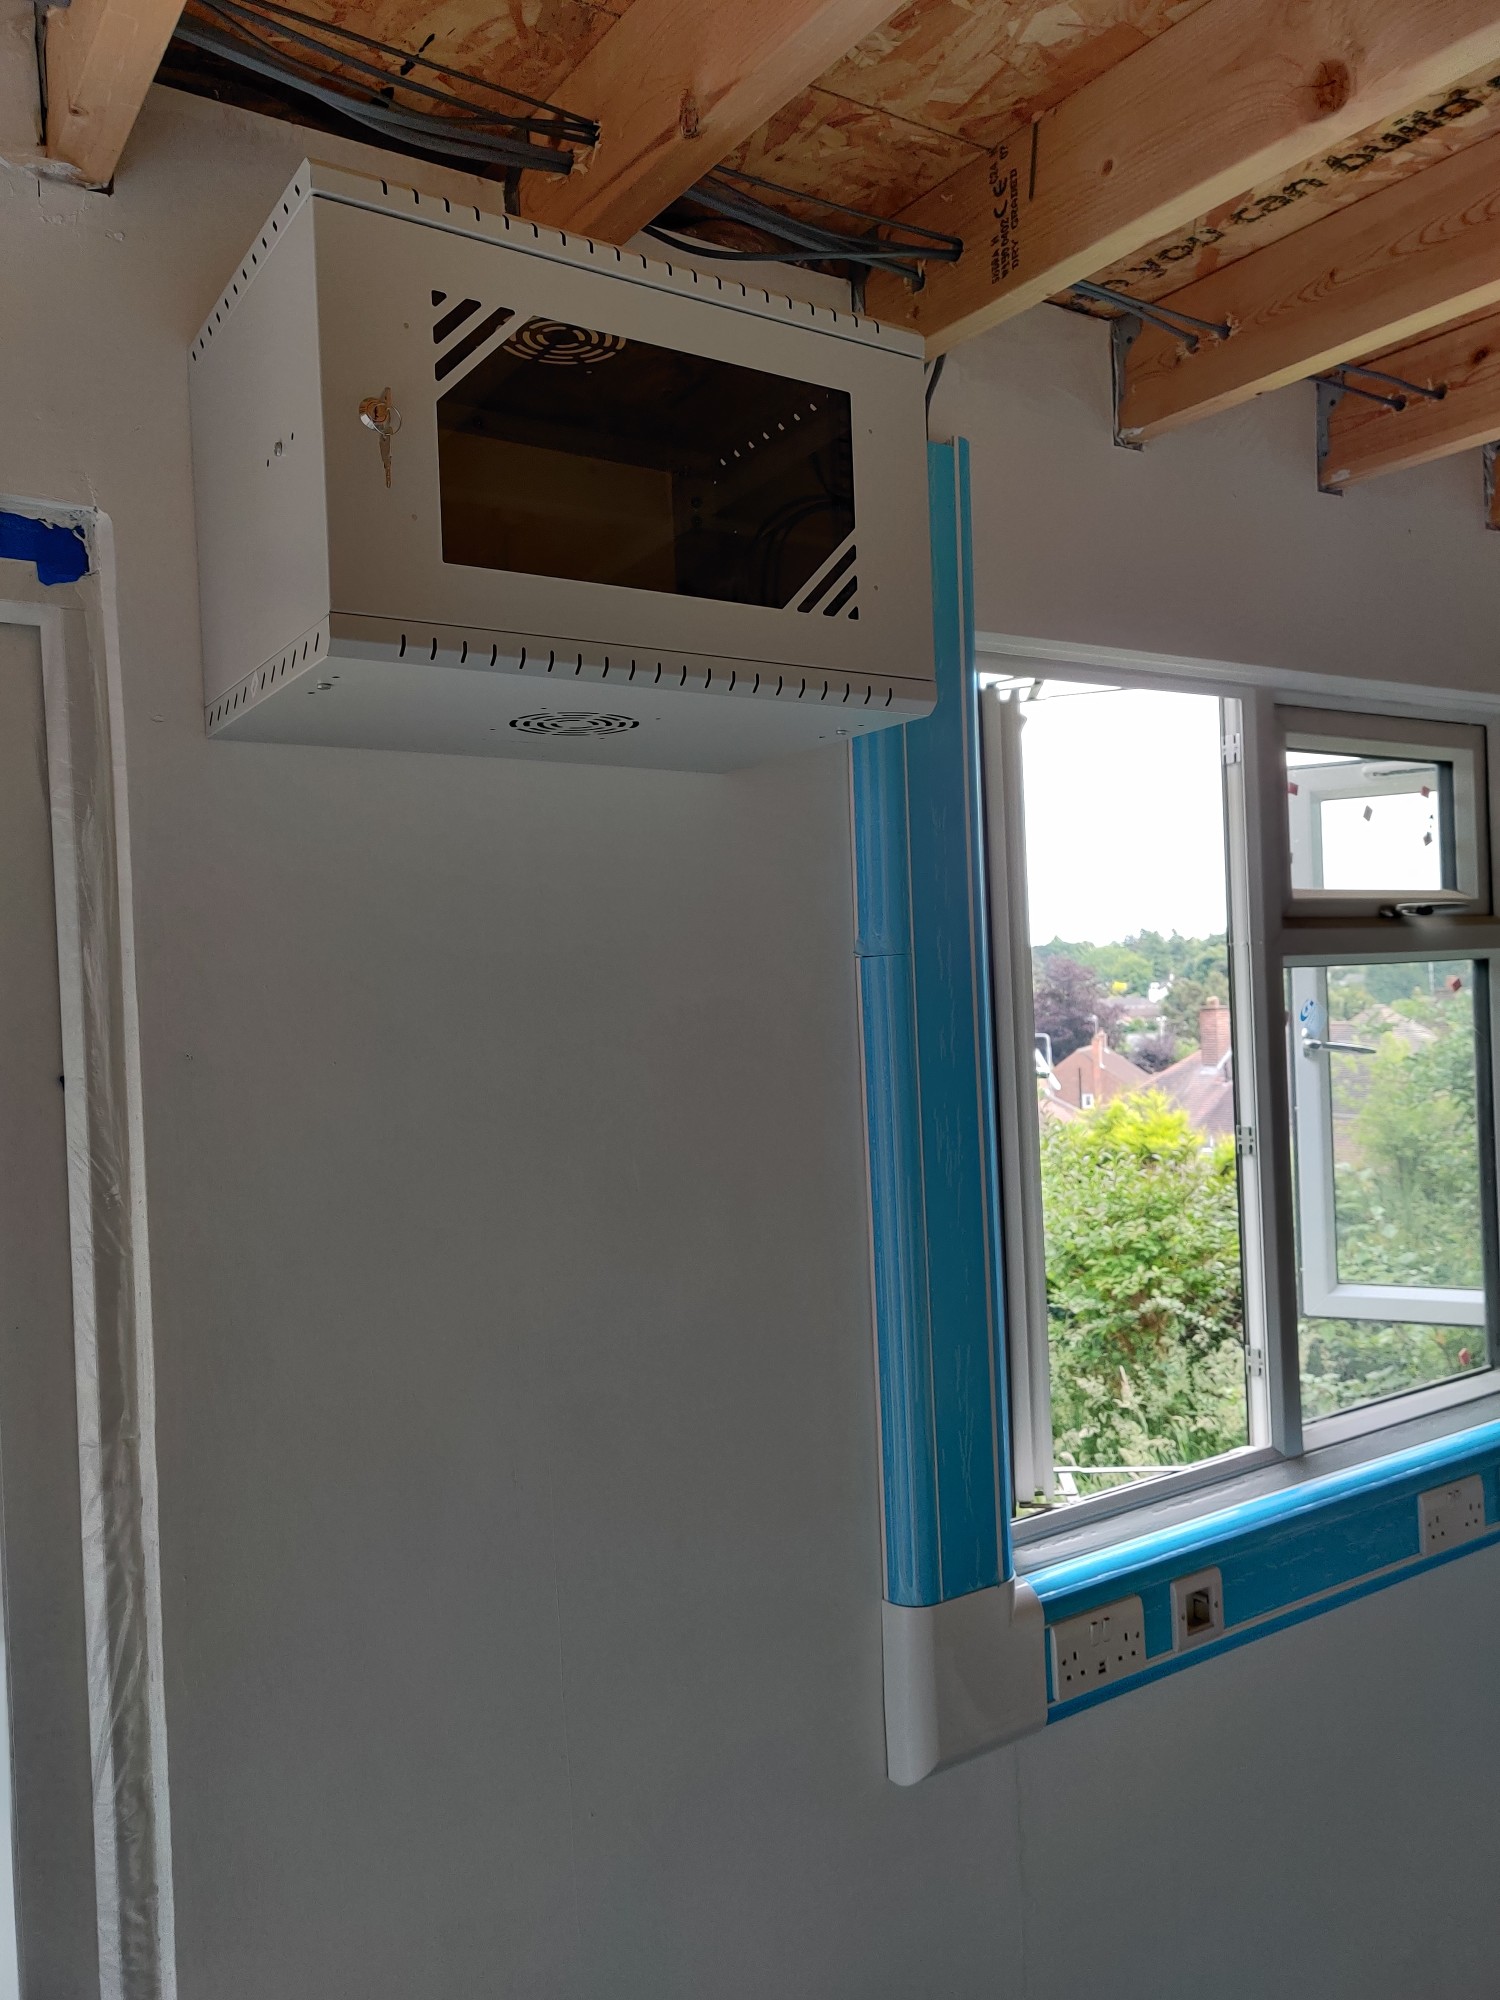
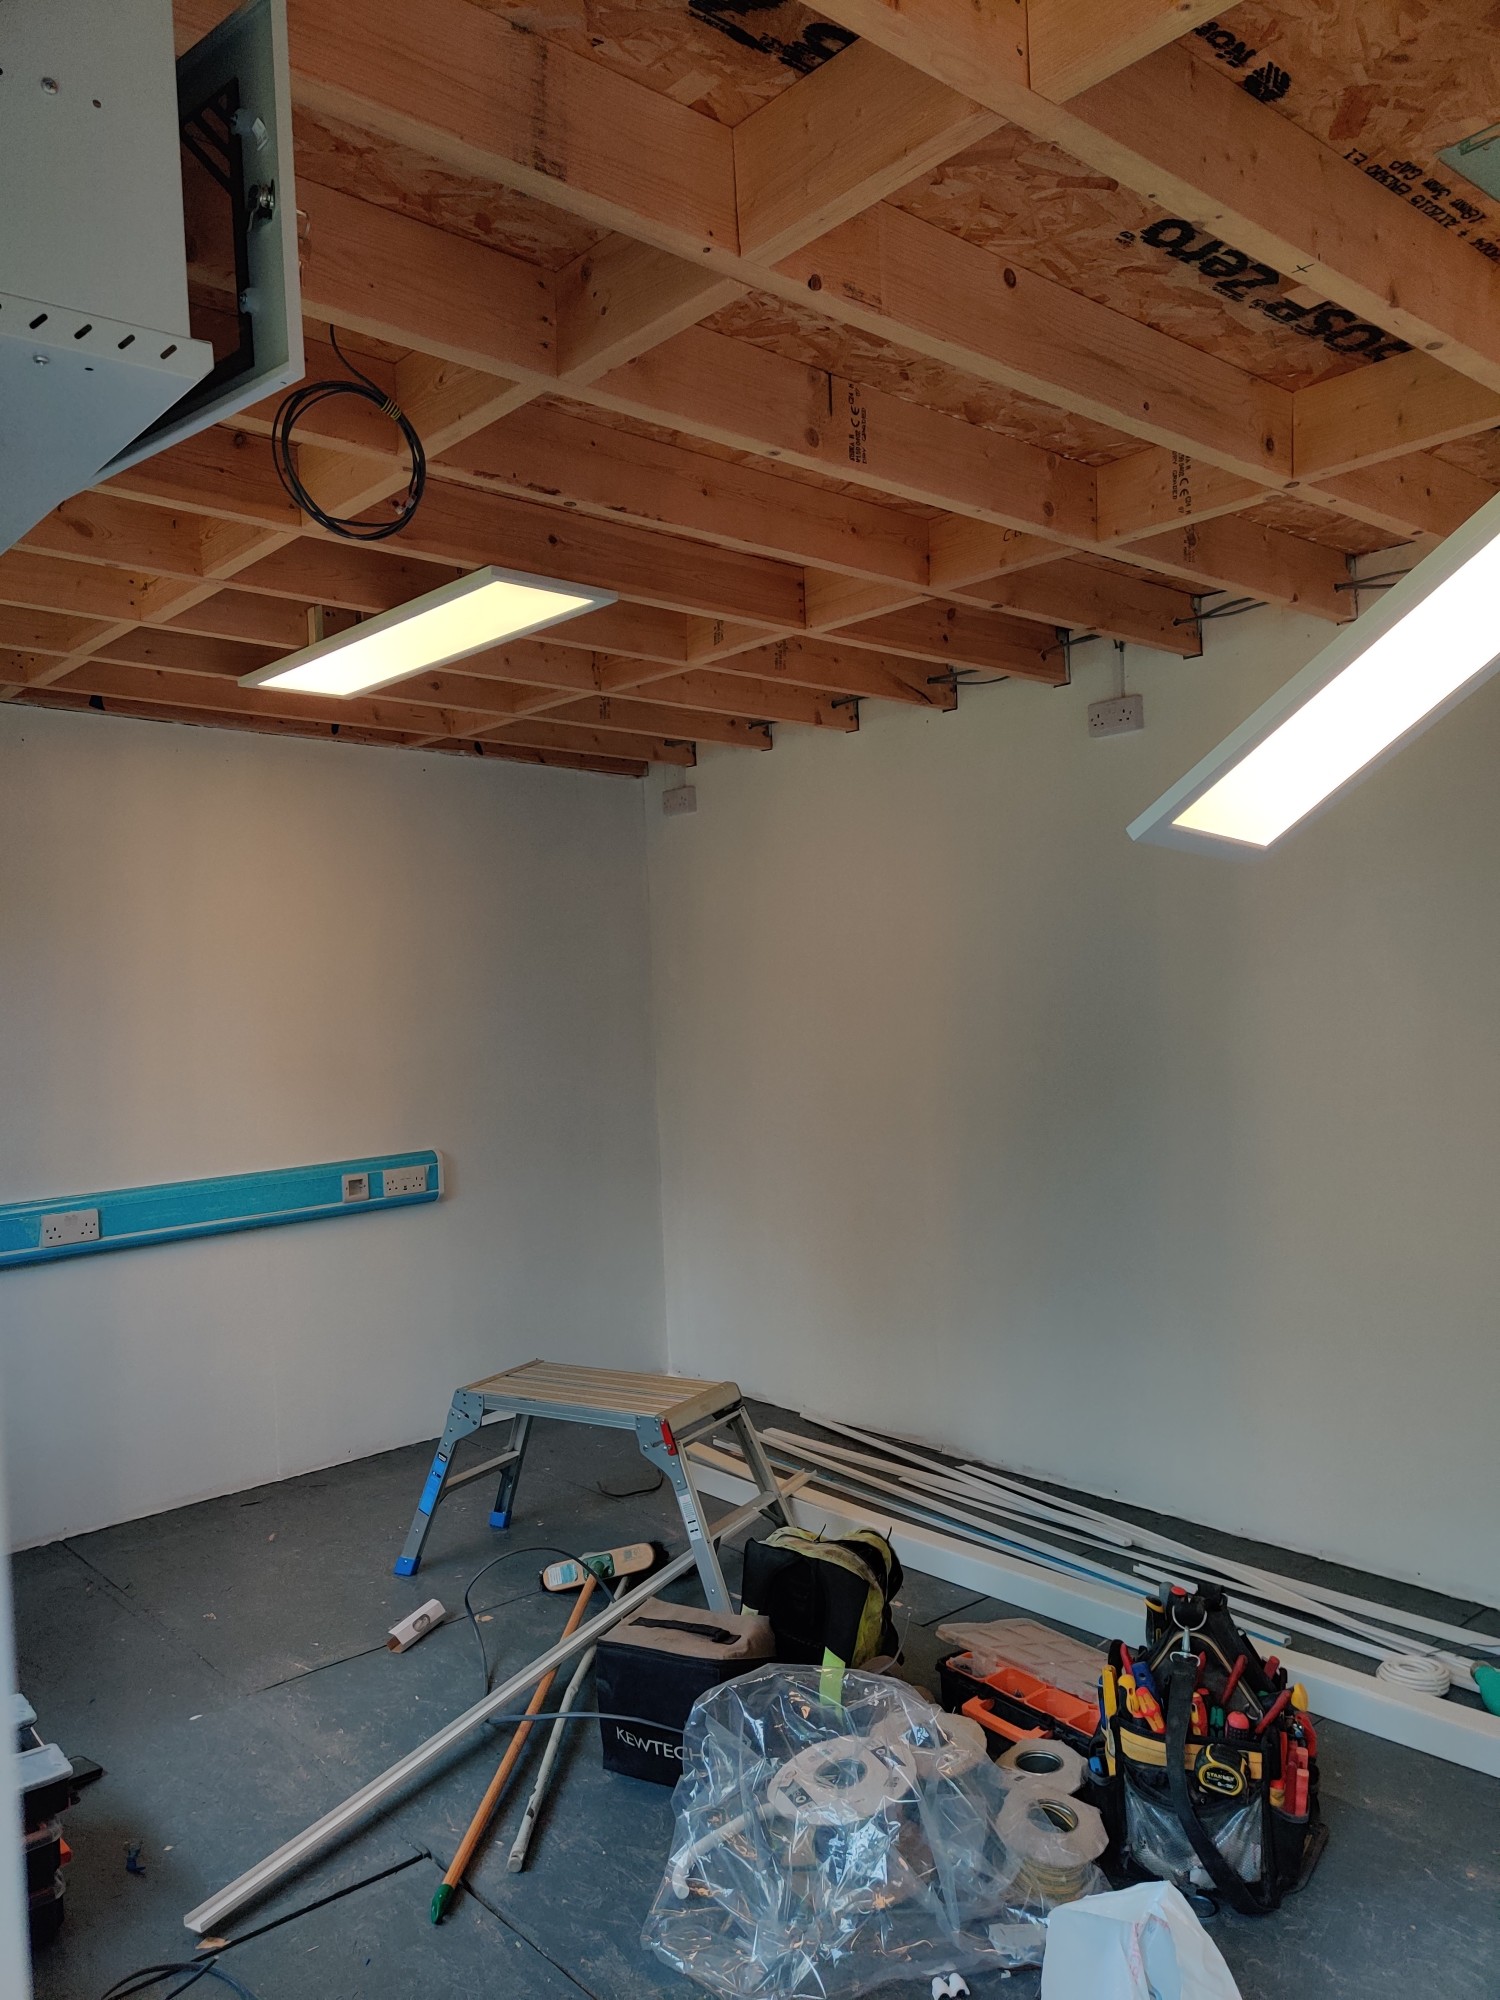
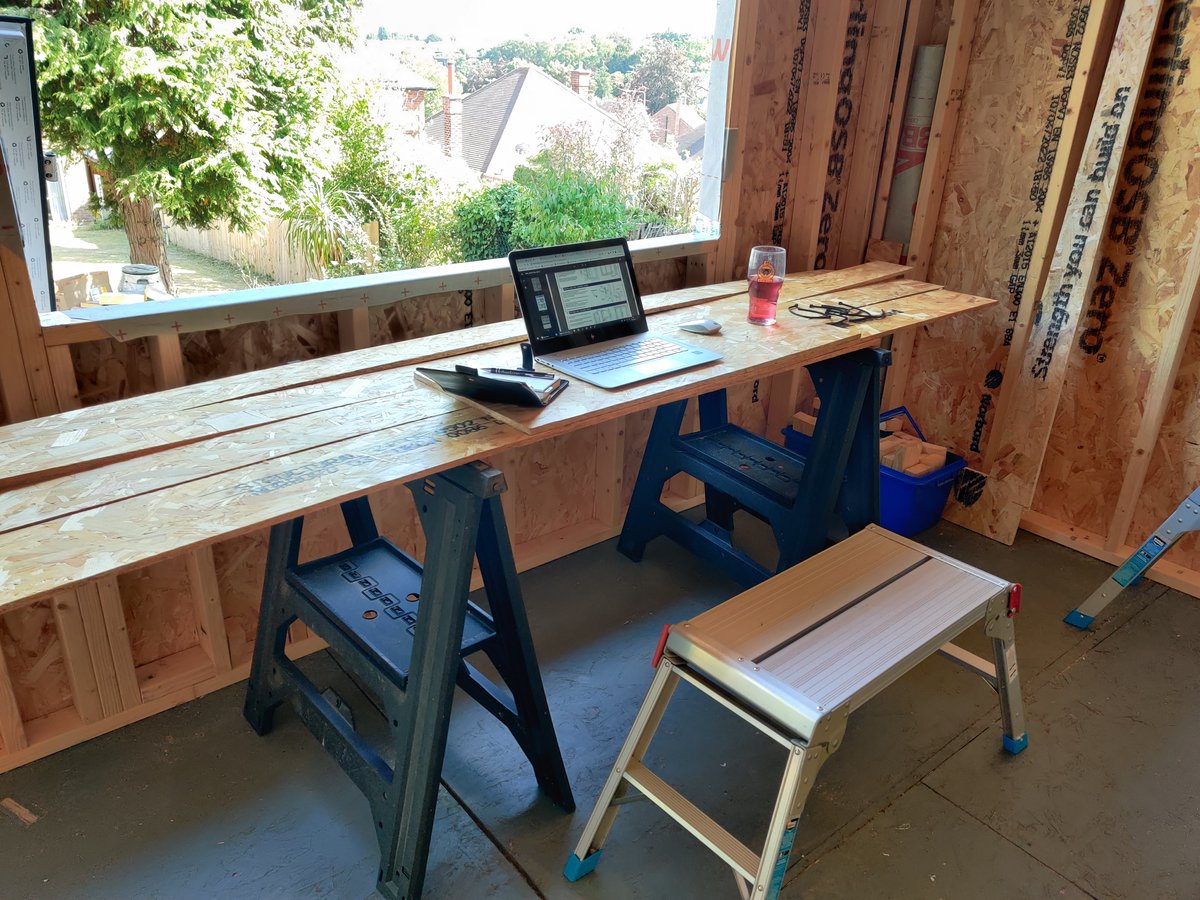
Inside the office I could run trunking and get things ready for the electrician to do his stuff. Whilst I probably could wire up the electrics safely myself, there are some jobs that I get a lot of peace of mind by paying a professional to do.

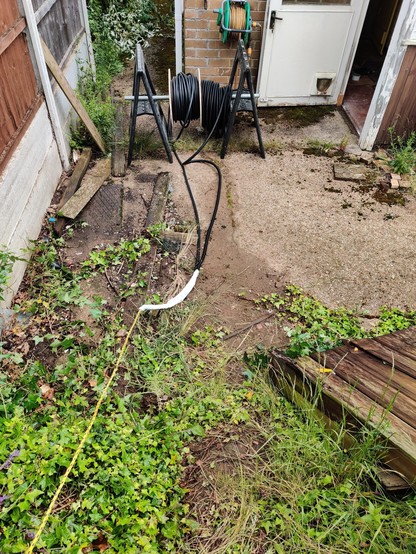
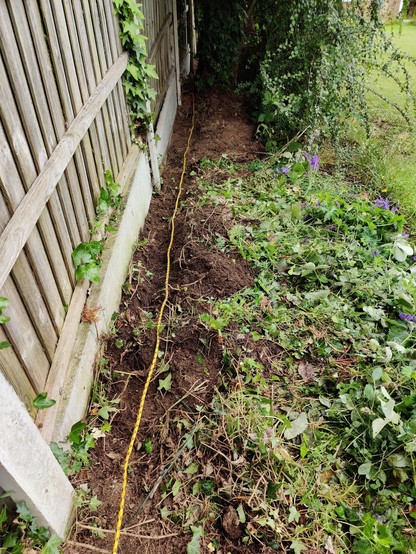
I ran the armored cable from the house to the office though, and that was much harder work than anticipated. Conduit for fiber and copper network cables was installed at the same time, but that wouldn’t be pulled through until the spring of 2025. Having power to the office was fantastic!

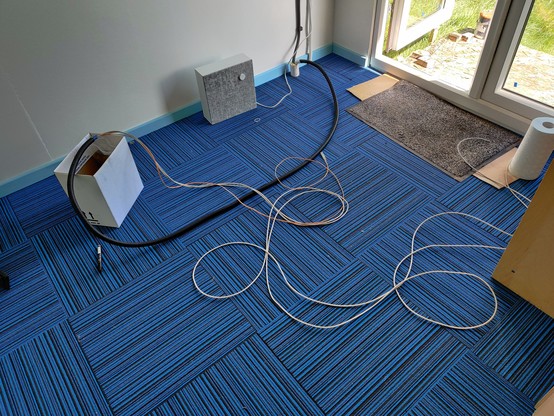
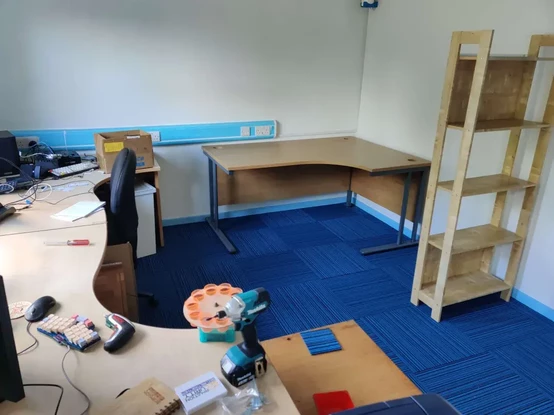
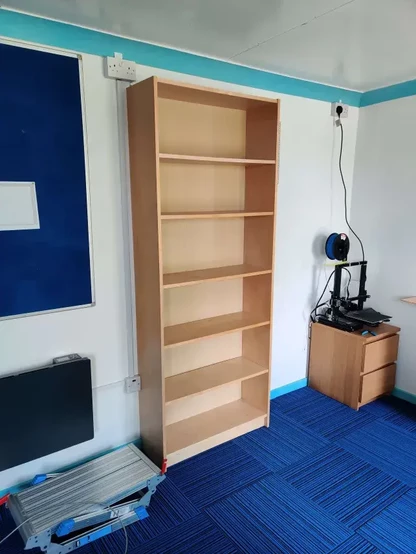
Now it was just the “easy” stuff like carpet, furniture, and moving in.

To make moving in as stress free as possible, z80kits was closed for a week at the start of June. Whilst I had been testing out the office with a few specific tasks, for the bulk of jobs it all needs to move in in one go. So everything related to RC2014 was moved from the spare bedroom to RC2014 Towers and allocated its new home in time to ship orders again on June 9th.

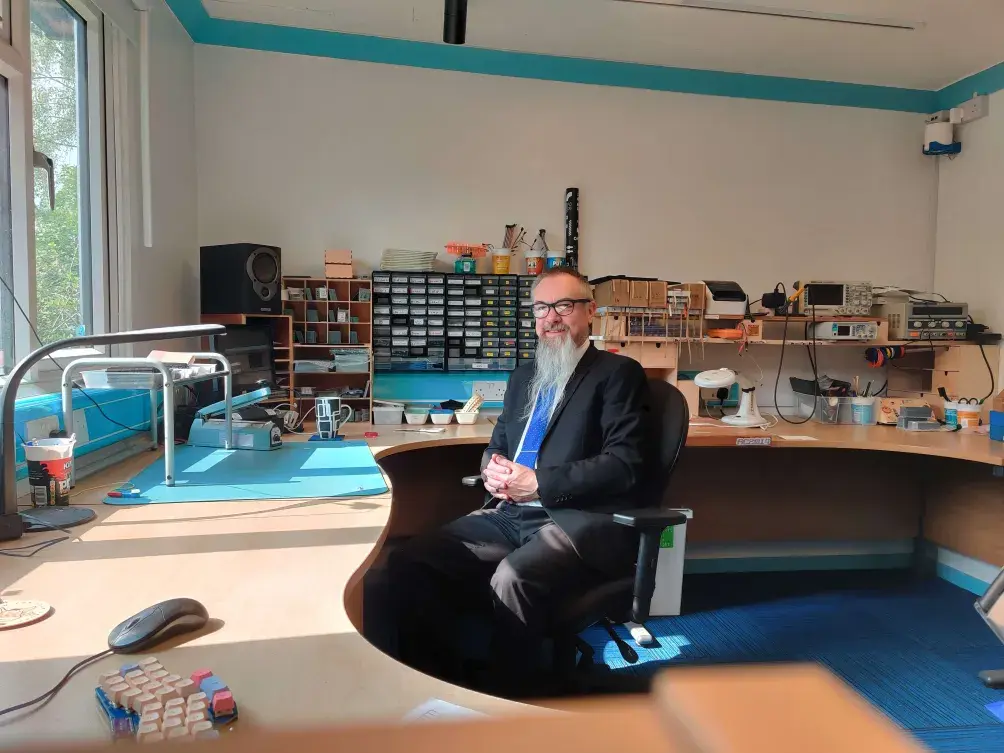
And there we are! Day 1 in RC2014 Towers and it is looking the neatest that it will ever look! There is 50% more surfaces to work on and 60% more storage too. This seems like overkill right now, although I know it won’t be long before I look back and wonder where all the space has gone!

When I started this build I was still on Twitter and I tweeted updates. The archive of those tweets is available here https://rc2014.co.uk/twitterbackup/rc2014towers/ (Select Browse and Oldest First for the chronological view). These days I use Mastodon, and you can follow the #RC2014Towers hashtag for updates https://mastodon.me.uk/tags/RC2014Towers

Retro Challenge January 2016 – Preamble

So, you may well remember that I entered Retro Challenge 18 months ago, and what a fun crazy busy time that was!  Well, the January Retro Challenge competition is about to kick off in just over 2 weeks.

If you’re not familiar with Retro Challenge, shame on you!  But you can de-shame yourself by heading over to http://www.retrochallenge.org/ and seeing what it’s all about.  Essentially, it’s a month long bi-annual competition where the entrants set themselves a goal based around old school computing and blog, tweet and share their experiences.  The goals are pretty loose, as long as they are based on something from last centuary (modern emulators of old kit is fine).

The challenge I set myself was to take a breadboard based Z80 computer and bring it to life in modular PCB form in such a way that I could spell out my name on.  Have a look back through my blog to see how I did.  Spoiler —->

IMG_20140730_205950

(more…)

Retro Challenge – Closing Thoughts

Wow! What an awesome month July has been.  The whole Retro Challenge thing has been great, and despite moments of stress or despair, I have thoroughly enjoyed taking part and seeing what everyone else has been up to.  Before I sum up my project, I should make a few honourable mentions.

Retro Challenge – A huge thanks to Mark and Wgoodf do a great job in hosting this twice a year.  Keeping everyone updated via Twitter has worked really well.  Cheers guys!

Grant Searle is responsible for the general Z80 design I used and also converted MS BASIC from the Nascom to run on this.  Really, this project is a test of my understanding of Grants work and seeing how far I can take things.

Nottingham Hackspace has an amazing “parts bin” that included the LEDs, Veroboard, case, some of the logic chips and the RAM I used.

OSHPark did a great job (for a very good price!) on the PCBs – even if the postal system did keep me on the edge of my seat for a bit!

Chris Gammell introductions to KiCad PCB design videos were critical in guiding me through the various stages of board design.

Rodney Zaks book Programming the Z80 has been like a bible for me.  Combined with a few dozen other resources of Z80 info on line I’ve been able to at least get the basics assembly language programming.

CLRHome is a great online Z80 IDE that can compile assembly language in a variety of output formats including for the ZX Spectrum.  I doubt I could have managed this in notepad!

All of the other Retro Challenge entrants deserve a mention too, but there’s a few that really caught my eye and taught me stuff about their particular approach to RC2014, such as Wgoodf – Turtles all the way down, Ians restoration of Northstar Horizon, Tezzas restoration and programming of Challenger 4P, John finishing work on Fahrfall

IMG_20140730_205950

(more…)

Retro Challenge – Challenge Complete

With over 24 hours to go before the end of July deadline the final piece of the puzzle fell in to place!

IMG_20140730_205950

But, first, a quick catchup from the last blog post;

(more…)

Retro Challenge – Finishing Post Within Sight

Despite a late start today, things have gone well so I actually feel like I’m ahead of the game right now.  Certainly not finished, but with most of the major hurdles now behind me, the only thing left is writing a bit of Z80 assembler code.  And even that is starting to look manageable.

(more…)

Retro Challenge – PCBs arrived and built

So, exactly 3 weeks after they were ordered, the PCBs from OSHPark arrived today.  It’s just as well, as I was running low on things to do without them, and with just 6 days left of the Retro Challenge I would have struggled to finish in time.

IMG_20140726_085406

Well, that’s my weekend planned out for me now! (more…)

Retro Challenge – The Matrix Reloaded

The 5 matrix board has now been finished. And no one could be more relieved than me.  There’s a LOT of soldering going on in there!

2014-07-20 17.25.04

(more…)

Retro Challenge 2014 – Day 5 – First PCBs Ordered

Hokey cokey, that’s the first 4 printed circuit boards for the RC2014 (Oh, did  tell you I’ve named my homebrew Z80 computer “RC2014”? Pretty catchy name, eh?) ordered with OSHPark.  If they arrive as quick as other boards I’ve had from there before, then I should have 11 days to get everything put together and working!

All 4 boards look fairly similar, being a CPU board, RAM and 2 variation on ROM, but here’s the 32k RAM board;

Screenshot from 2014-07-05 16:02:42 (more…)

Retro Challenge – Day 2 – First PCB Designed

So, this is Day 2 of the Retro Challenge.  In case you’re wondering what happened to Day 1, well, Day 1 happened to fall on Pub Night, therefore I was better off giving everyone else one day head start than having a go and probably putting myself back at least a week!

If you’ve read my posts on Retro Challenge so far, you’ll know my first priority is to get about half a dozen or so Printed Circuit Boards designed and sent off to the fabricators.  The tool I am using to do this is KiCad, and the basic workflow is lay out the electrical circuit schematic, create a list of component, match the components up to footprints, lay the footprints out on a board, join up the various pads then create gerber (manufacturing) files.

I have decided to build my Z80 computer in a modular format, with lots of fairly basic PCBs to make up the whole thing.  This should give me flexibility in how I use it and what I do with it going forward.  It also makes the boards easy to design and lay out, and, if necessary, easy to troubleshoot too.  So, with that in mind, I set out this evening with the goal of making the electrical schematic for at least 5 boards.  Starting with the CPU board, which comprises of 1 chip, 1 connector and 1 resistor.  Simples!

KiCad uses libraries of components, so when you lay out a circuit you can pick a resistor, a capacitor, voltage regulator etc.  It’s got loads of chips in the default library that comes with it, but, as I discovered this evening, no Z80! I tried finding a library on line that had one, but couldn’t get anything that worked.  So I had to design my own component – a 40 pin IC! Then, the connector I was going to use was for my Z80 bus, and that had my own designed layout, so that’s another 40 pin component I had to design!  Luckily, a regular resistor was already available!  So, join the appropriate pins up, and voila! A schematic!

Screenshot from 2014-07-02 22:35:38 (more…)

Pre-RetroChallenge – The story so far

Ok, so tomorrow the Summer RetroChallenge 2014 starts, so I thought it would be a good idea to bring you up to speed with what I’ve got so far so that you know where I’m starting from. I will also outline where I’ll be taking things for the RetroChallenge as well as where this project may go in the future.

So, in December 2013 I started poking around the internets for some ZX80 info, and I stumbled upon Grant Searles website. More specifically, he had the schematics for a Z80 based computer and a ROM with Microsoft BASIC on it. So, over Christmas I got out my breadboards and built it up pretty much as per the schematic.

2013-12-23 17.22.09 (more…)